
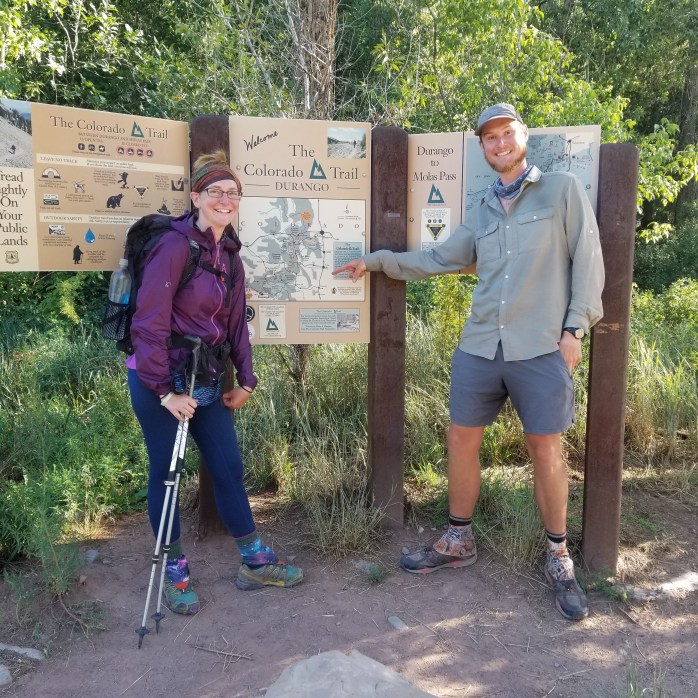
The Colorado Trail: 75 Miles from Silverton to Durango

Day 33 – 10.3 Miles
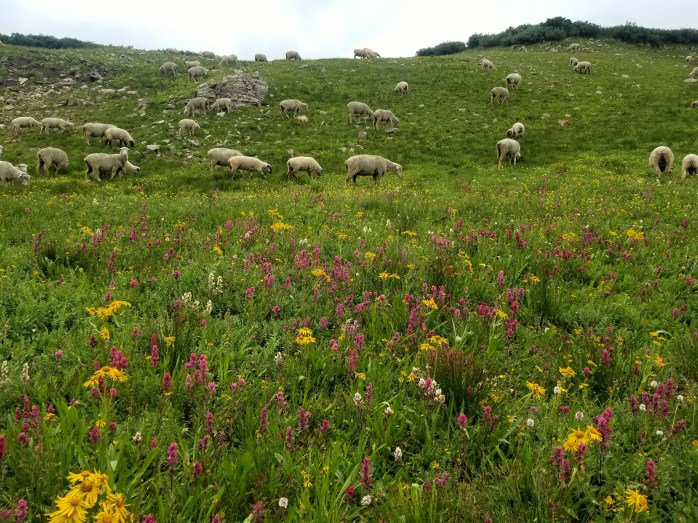
We pulled ourselves out of Silverton just after noon with enough supplies for our final 75 miles of the Colorado Trail. We walked through a light rain for a couple hours and stopped after about ten miles of hiking near a herd of grazing sheep.


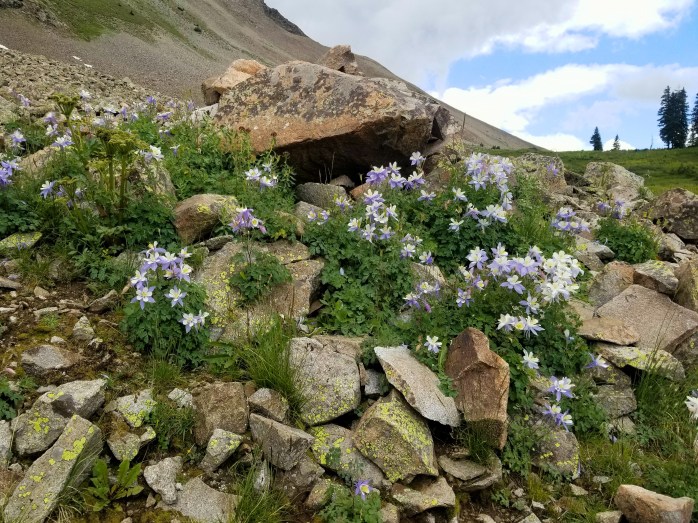
Day 34 – 18.1 Miles
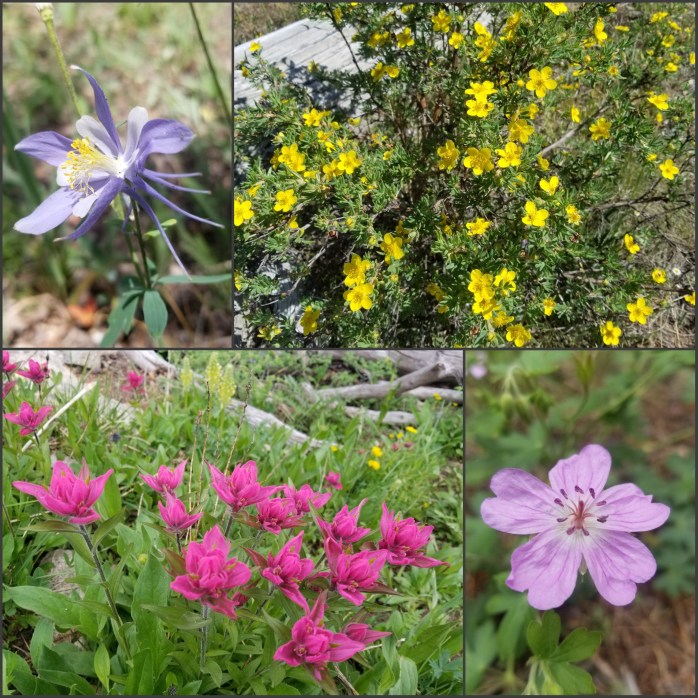
We spent a long and beautiful day hiking along a ridge line passing countless wildflowers.

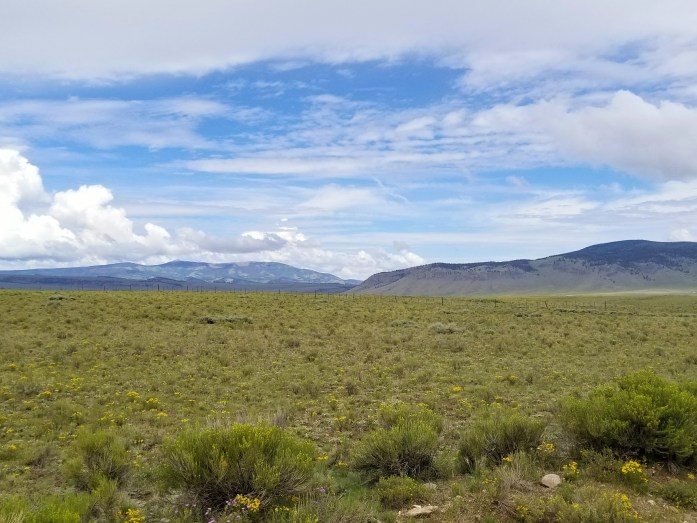
Day 35 – 20.4 Miles
We woke up with under 50 miles to get to Durango. We spent our whole day hiking eagerly with the finish line virtually in sight.

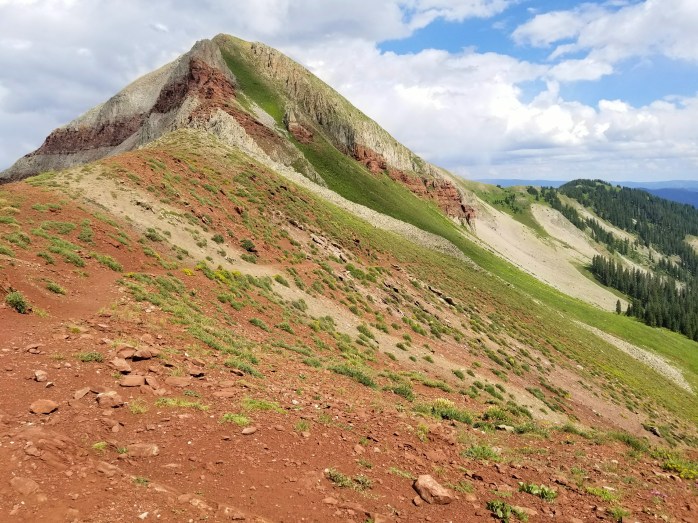
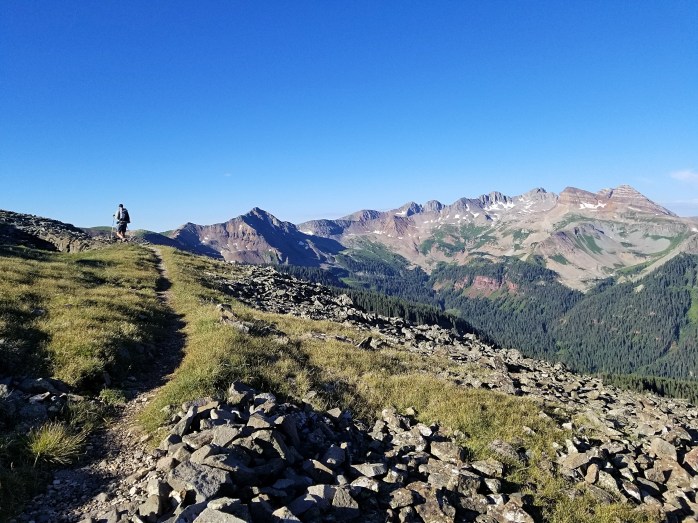
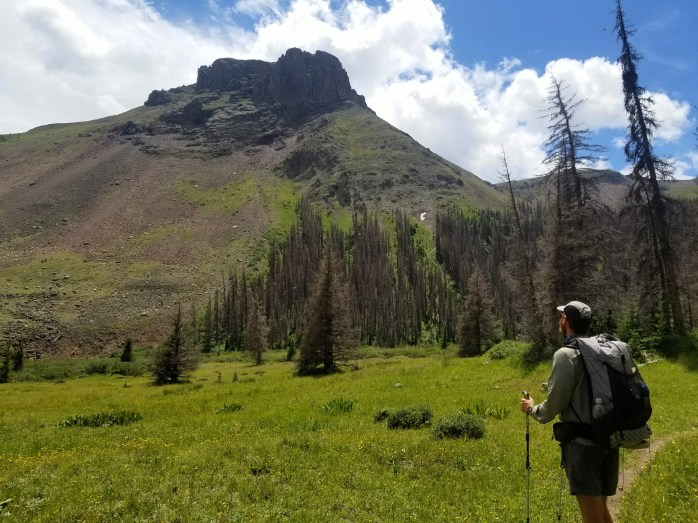
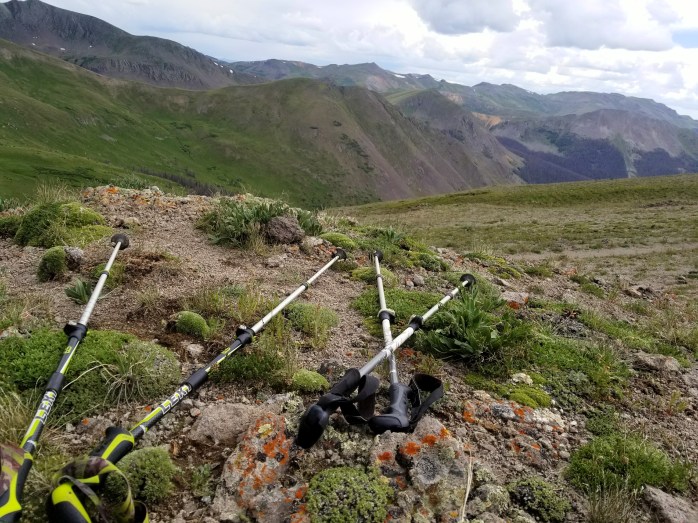
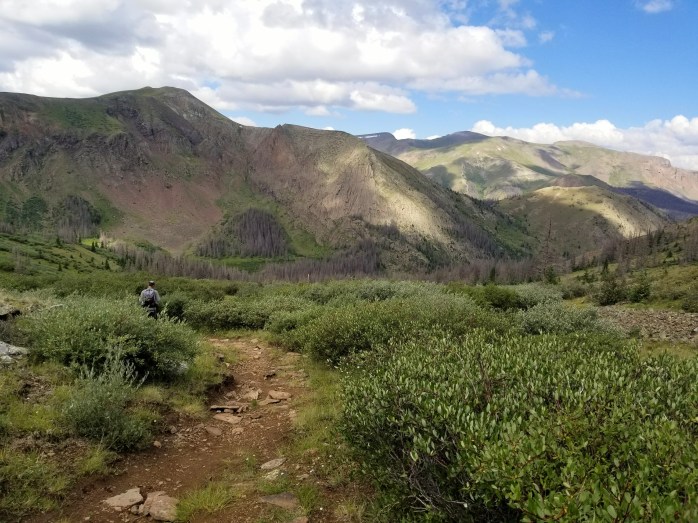
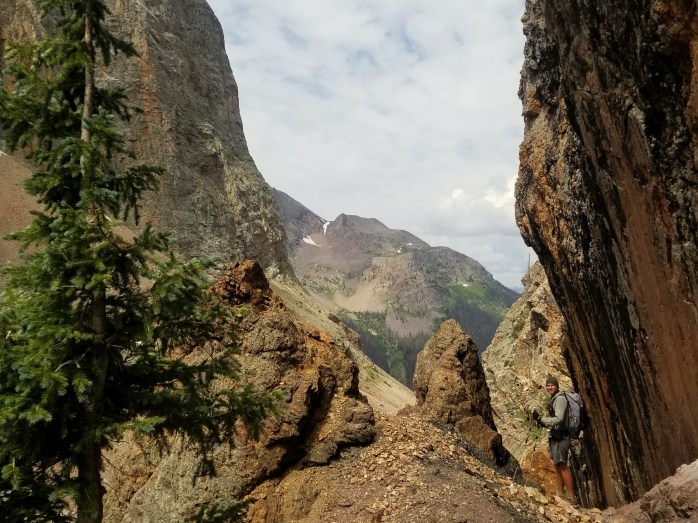
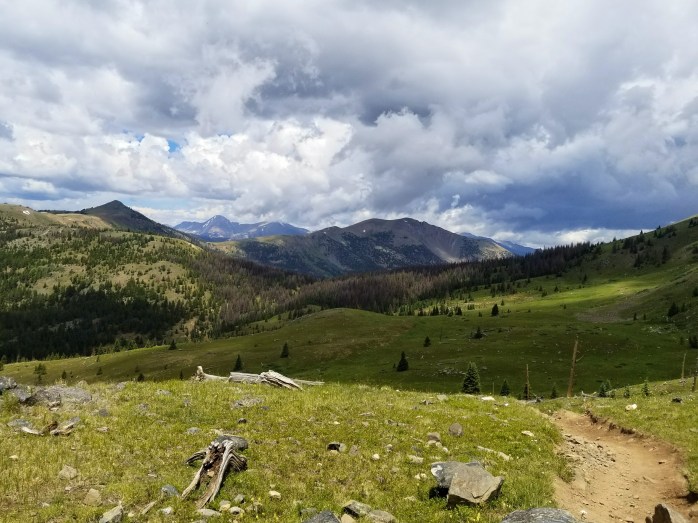
Day 36 – 20.8 Miles
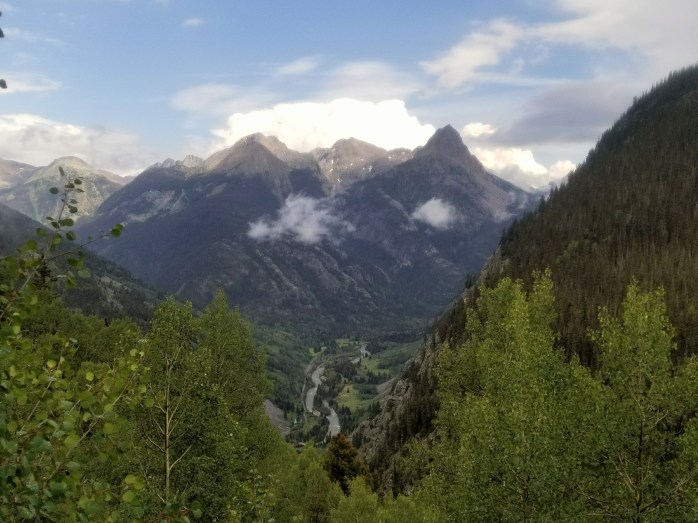
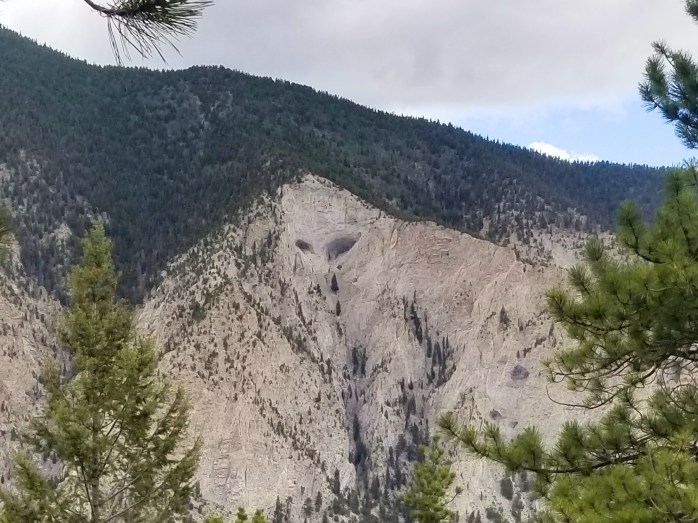
Our final full day of hiking had arrived. We spent our morning on a high ridge line then began a long descent that would bring us to town. I found myself saying goodbye to the silly marmots, the colorful fields of wildflowers, the endless mountain views. Our remaining miles descended at a easy grade while we reminisced over the past month of hiking. Nearing camp, we spotted our first and only black bear on the Colorado Trail. It was just a cub, and we were glad we never saw mom.


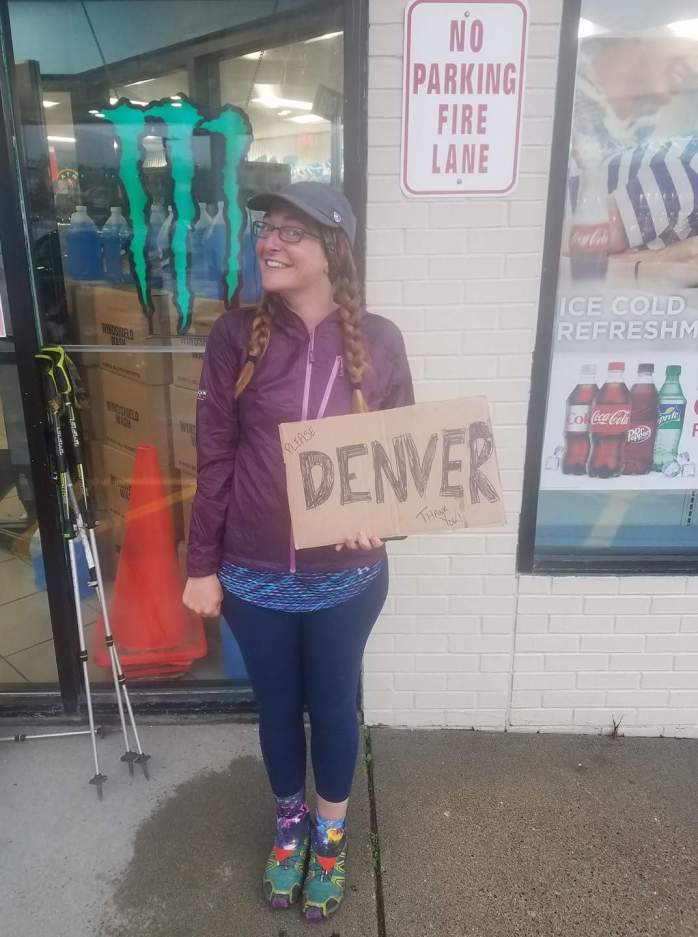
Day 37 – 4.3 Miles
We awoke with under two hours of hiking left to bring us to the Durango trailhead. The morning walk flew by and that was that! We had completed the entire Colorado Trail from Denver to Durango. Between our miles on the Appalachian Trail, the Pacific Crest Trail, and the Colorado Trail, we have now walked over 5,000 miles together!
Overall
The Colorado Trail is incredible and a lovely length for a thru hike. It is equally as challenging as it is rewarding with mountain views as far as the eye can see, intricate cliff walls, waterfalls, caves, and fields of wildflowers in every shade. We completed the trail from July 5 – August 10. We took our time as we were not on a constricted time frame. This trail can definitely be completed within a month if needed. It is also very well setup for section hiking and is divided into 28 segments. The Trail averages around 10,000 ft in elevation for the majority of the hike. At such a high altitude, the weather can change rapidly. Most afternoons there was a storm.
Stats
- Miles Hiked: 474
- Number of Days: 37
- Number of 0 Mile Days: 5
- Overall Miles per Day: 12.8
- Miles per Day w/o 0’s: 14.8
- Most Miles in a Day: 23.9
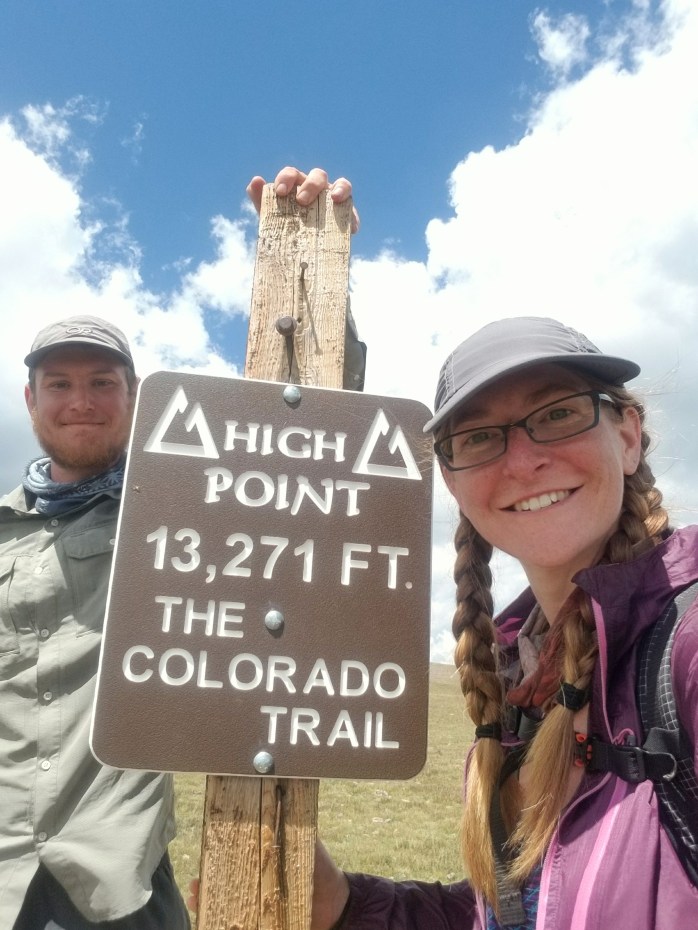
- Highest Elevation: 13271 ft.
- Lowest Elevation: 5515 ft.
(Note: The Colorado Trail is 486 Miles. We missed 12 miles due to a wildfire trail closure near Breckenridge.)
Check out more stories from our hike here – Colorado Trail 2017
Next Up – I heard there’s a once in a lifetime eclipse coming up…
Follow along on Instagram
The Colorado Trail: 110 Miles from Saguache to Silverton

Day 26 – 22.3 Miles
We started our day pleased that we had managed to get back to the trail before dark the previous evening. Our ride mentioned the miles of cow pastures ahead and the less than desirable water sources in the area. We moved on hoping our 1.5 L each would get us to a clean source.
Around noon, we noticed a truck parked in the distance and dreamed about the possibility of trail magic. As we approached, we realized our dreams were coming true! CT Hiker Gummy Bear had chairs set up waiting on us with cold Gatorades, chips, and plenty of water to get us past the shitty (literally) water sources.

After a nice break, we walked on taking a brief stop to pop the poles and rainfly and dodge the afternoon storm. Our last challenge of the day was crossing a cow infested creek, our first ford on the Colorado Trail. It took some time and skill, but eventually we found a safe spot to get across though the water was rushing above my knee.
Day 27 – 13.7 Miles
We began our day a little later than usual with a big climb ahead. We entered La Garita Wilderness Area and left the cows behind.
It took us all day and most of our energy to climb to the top of the pass. When we finally made it, we were next to the spur trail for the summit of San Luis Peak and had incredible mountain views in all directions.
We walked a couple miles down the trail, but decided we didn’t need to push too hard since we did a big day the day before. We found a perfect campsite next to a stream with amazing views and decided to call it a short day.
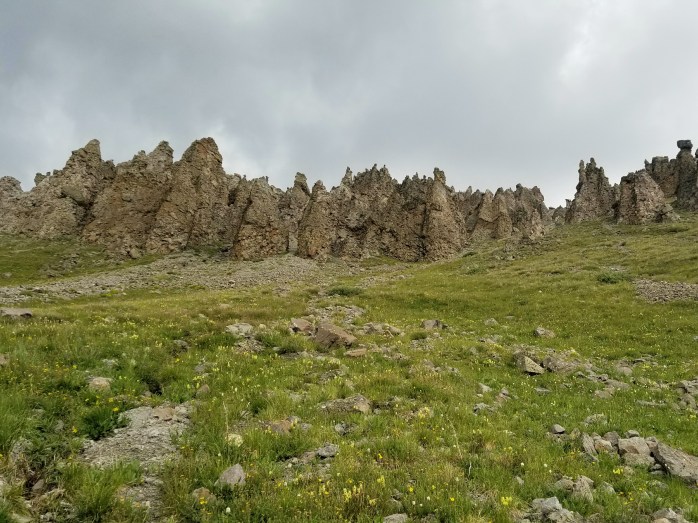
Day 28 – 19.6 Miles
We started our day with 4 back to back climbs, pass after pass. 500 ft up and over, then 1000 up and over, then 400 up and over, then 1200 up and over. Though we definitely had our work cut out for us, the challenge was worth the reward.

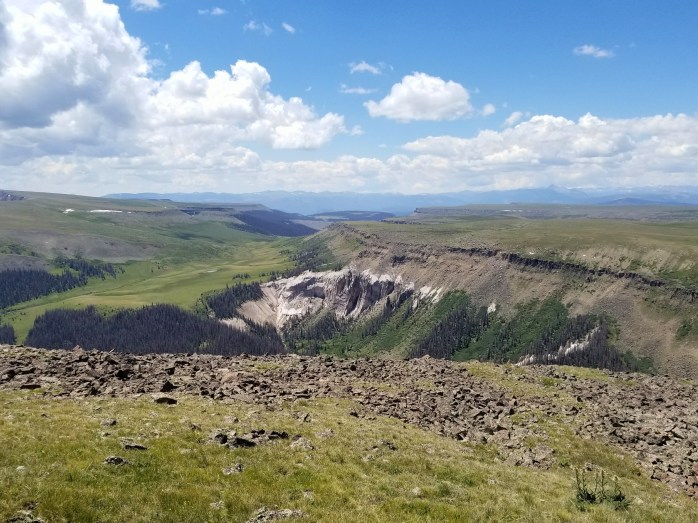
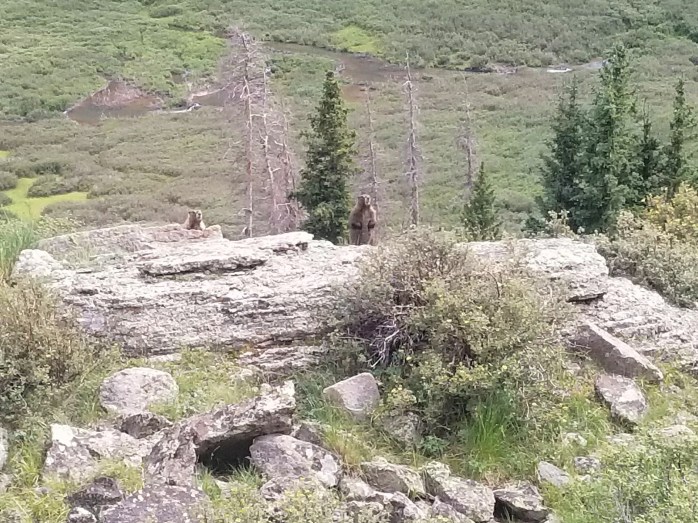
We were thrilled that the weather cooperated all day and were blown away by the interesting rock formations, cliffs, mesas, and mountain views as far as the eye can see. We even saw dozens of my favorite mountain dwellers – marmots!!
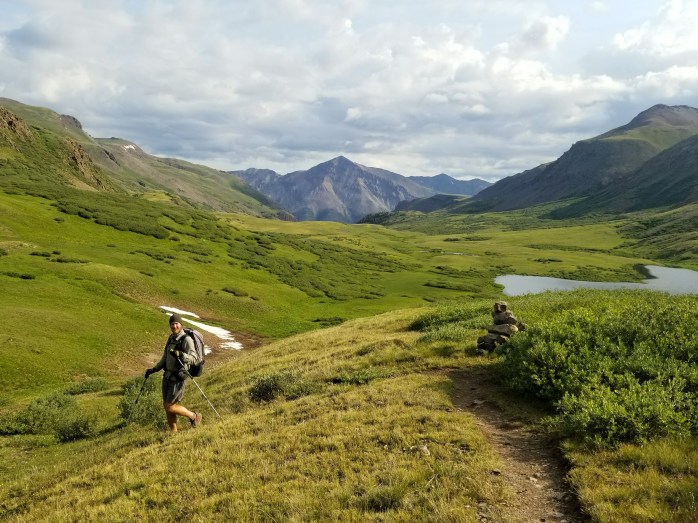
Day 29 – 15.5 Miles
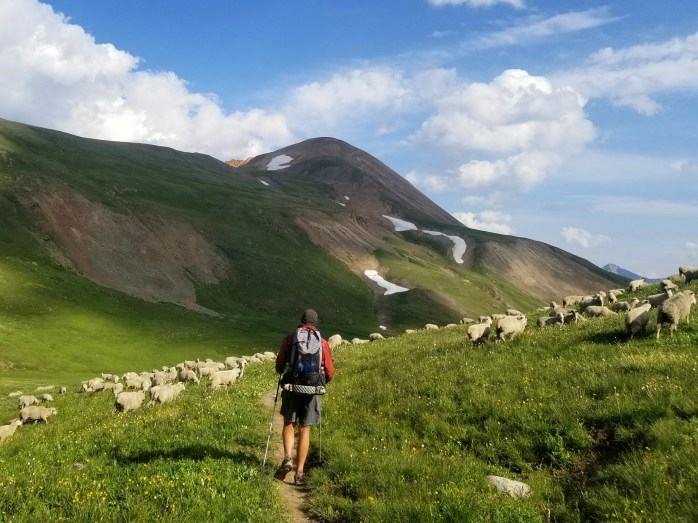
We woke knowing we had another big day of climbing ahead of us. Today we would reach the Colorado Trail high point. The first few miles were pretty relaxed. As we walked, we heard strange noises in the distance that sounded like a cow was being attacked by a pack of wolves. We stared at the mountain ahead unable to figure out what we were hearing. Suddenly, I realized the rocks I was staring at were moving. Ha, those aren’t rocks, they’re sheep!!


Day 30 – 15.1 Miles
We hit the trail early still enjoying the views in all directions. At about 10 am, we noticed menacing clouds approaching and debated whether we should continue waking up a ridge or stay down below and wait it out. We made a quick decision to pop the rainfly and poles and were sure glad we did. The wind threatened to push over our little structure that was getting pummeled with hail, rain, and ice. The storm raged on for nearly three hours, then the sun emerged as if nothing had happened. We were happy, as usual, with our decision to stay dry and warm.

We finally walked on still in awe of our surroundings. In the late afternoon, we came to a creek and stopped to get some water. We could see a few sheep poking their head around a corner, retreating as they saw us. Suddenly, a beautiful white shepherd dog spotted us and shyly approached. Her tag read “Sheep Protection Dog. Leave Me Near Sheep.”

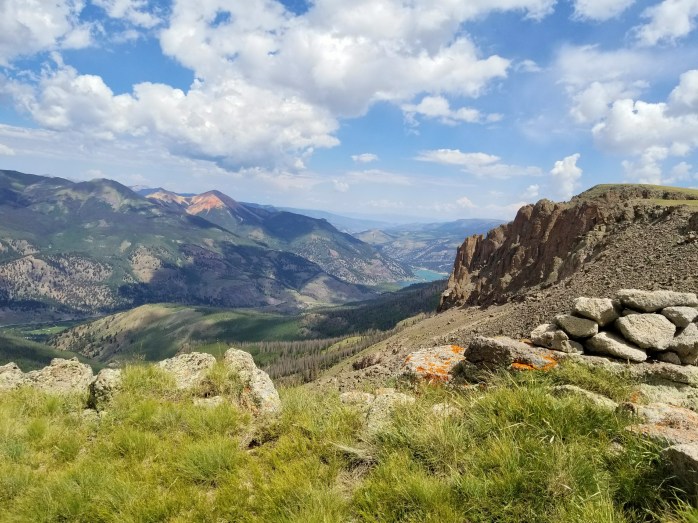
Day 31 – 17.7 Miles
We woke up just shy of 20 miles away from Silverton. We had walked nearly 2 weeks without a shower or clean laundry. Even though this was my favorite section of the Colorado Trail thus far, I was still dreaming of town, showers, and the hostel room that awaited me.
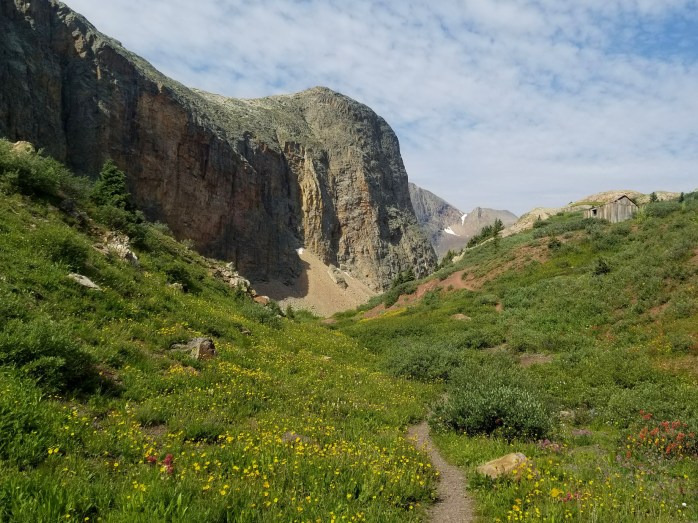
It was a gorgeous morning still up near 12,000 ft on a ridge. We approached a slot canyon and prepared for the nearly 10 mile descent.

We took a break near an old miners cabin then continued down. The afternoon brought rain, and we were glad to be going down the mountain. We stopped walking around 6 just two miles from the highway to Silverton. We pitched the tent near a huge pine tree that was practically dry underneath and happily made dinner protected from the rain by the branches.
We walked a brisk 2 miles to the highway the next morning and caught a ride fairly easily. All of our town dreams came true in Silverton, an historic miner town and outdoor lover’s paradise.
This section was truly some of my favorite hiking to date. Somehow the Colorado Trail only gets prettier the further south you travel. 410 miles down, 75 to go! Last stop Durango!
The Colorado Trail: 86 Miles from Buena Vista to Saguache

Days 17 – 20 – 0 Miles
Yep, you read that right. 4 Zero Days. I wrote my last blog, Copper Mountain to Buena Vista, at the Buena Vista library with all intentions of heading back to the trail before noon that day. But sometimes Sean and I have a way of putting things off. Since it was the weekend of my 28th birthday, we decided on a whim to try to hitchhike from Buena Vista to Denver to catch String Cheese Incident play at Red Rocks. Through a series of three hitches, we made it just as the band started their opening song🎶 🧀💃😁
The rest of the weekend was filled with food, comfy couches, cartoons, and even a surprise vegan cake from my friends, David and Katie! Our awesome friends drove us back to Buena Vista where we decided to go white water rafting down the Arkansas River. Overall, pretty epic spur of the moment birthday weekend.

Day 21 – 16.1 Miles
It was finally time to get back to hiking after my birthday fun. We crushed 16 miles with an 11 am start. Not bad. Our next stop was in the tiny town of Saguache where a resupply package was waiting for us. We knew we had some work to do to get to the post office before it closed at 11 am on Saturday, 4 days and 86 miles away. We ended our 16 mile day with beautiful views of Chalk Cliffs.

Day 22 – 19.5 Miles
Fairly uneventful day on the trail. We walked plenty of miles to keep us on track to get to the post office on time.
Day 23 – 21.9 Miles
We started our day with a big climb up to a pass where the Collegiate East and West routes come back together coinciding with the Contintenal Divide Trail. After passing literally millions of wildflowers, we finally made it to the top with stunning mountain views in all directions.

Day 24 – 23.9 Miles
We began the day hiking up a mountain and crossing huge cow pastures. We intentionally pushed ourselves hard to make sure we got to the highway in time to hopefully catch a ride to Saguache. The afternoon brought relentless rain which thankfully let up long enough to cook dinner.


Day 25 – 7.4 Miles
We hiked about 5 miles to the highway and arrived at about 9 am. Saguache was nearly a half hour ride from the trail crossing, and we needed to arrive before 11. After nearly an hour of no luck, a young woman pulled over and got us to the post office with about 10 minutes until closing. We were thrilled to pick up our resupply and the wallet I left in David and Katie’ s car.
We wasted the day in town and miraculously got a ride back to the trail before dark. We were all ready for a 110 mile stretch from Saguache to Silverton.

Colorado Trail: 97 Miles from Copper Mountain to Buena Vista

Week 2 on the Colorado trail brought us from Copper Mountain to Buena Vista over 97 miles. This trail continues to amaze me despite its challenges. So in love with the Colorado Trail!!

Day 9 – 0 Miles
We were hoping after our day in Breckenridge that the next segment would reopen after a large forest fire had been mostly contained. Unfortunately, the segment was still closed forcing us to skip the segment and pick up the trail at Copper Mountain Resort. Thankfully the public buses between Breckenridge, Frisco, and Copper Mountain were free, frequent, and easy to use. We headed to Copper Mountain around noon right as the daily afternoon storm was beginning. It didn’t take much to convince us to take a full zero day in nearby Silverthorne and dodge the rain.
PSA: If there is a fire ban in an area that you are camping in, then that means FIRES ARE BANNED!!! Please respect the protected areas and the rules that come with it. No one ever thinks they’ll be the cause of a forest fire, but two hikers are responsible for the Breckenridge fire that caused hundreds of millions of dollars of damage. Please, don’t be that person.
Day 10 – 12.8
We headed out from our hotel in the morning back to Copper Mountain ready for a week long stretch on trail. It was nearly 1:30 by the time we were ready to hike, but the afternoon dark clouds didn’t deter us. Instead, we walked on up a steep climb heading towards the 12,000 ft Kokomo Pass. Despite the rain and low temps, the scenery was still awe inspiring. When we finally finished the daunting climb, we immediately began looking for a campsite. We were delighted to end our hike impressed that we had completed nearly 13 miles despite our late start.

Day 11 – 14.6 Miles
We were thrilled to see the clouds clear and the sun shining when we broke camp. We enjoyed a beautiful day that ended with a wooden swing in the woods.

Day 12 – 16.1 Miles
We began our day by entering San Isabel National Forest and a huge climb up a mountain. Our hard work was rewarded with epic views of Mt. Massive and Mt. Elbert in the distance.

Day 13 – 19 Miles
In the morning we walked near the trail spur for both Mt Massive then Mt Elbert. We didn’t really prepare food or our schedule to bag any 14,000 footers this time around, but I’m sure we’ll be back. Instead, we enjoyed a long afternoon under our tent pole / rain fly set up while the storm raged. We finished the day by hiking 7 miles after 6:00 pm with unbelievable views around Twin Lakes.

Day 14 – 15.8 Miles
In the morning, we arrived at the trail split for the Collegiate East and West routes. Either direction is the official Colorado Trail while the official Continental Divide Trail takes the Collegiate West route. We decided to go east this time with our intentions of doing the western route on our CDT thru-hike next year. This section continues to be as tough as it is beautiful.
Day 15 – 12.1 Miles
We began another doozy of a day climbing nearly 2000 ft in two miles. Yikes! We came to Silver Creek just as the afternoon storm was rolling in and popped the fly for a few hours. The sun reappeared, and we broke down our setup to hike a couple more steep miles up the mountain. We were hoping to reach the near top leaving four miles to the road where we would hitch to nearby Buena Vista. We began our early evening hike and the rain returned. We pushed on a little longer until the rain turned to hail when we decided to return to our spot by the creek. Now soaking wet, we pitched our tent again and settled in for the night.

Day 16 – 6.7 Miles
Morning brought the sunshine and we broke down camp early. We began a 2500 ft climb over three miles bringing us to a height of nearly 12,000 ft and just a few miles east of the summit of Mt. Yale. The views took my breath away. After a little yodeling and listening to the echos, we headed the remaining miles down the mountain to the road.

It only took a few moments before a nice woman happily drove us into Buena Vista. We were thrilled to be in town and had one more thing to look forward to. My good friend Claudia volunteered to be our trail angel for the day!! After she helped us run our errands, she graciously housed us for the night in her mountain home about an hour from trail. Boy are we spoiled!!!
Well, it’s just about time to head out again. 216 miles down, 270 to go!!! If you couldn’t tell, we are head over heals for the Colorado Trail. If you’ve got a month to go hiking, this trail is for you! It’s also set up in segments for those without so much free time. Truly, I couldn’t recommend this trail any higher.

Follow Along our next 268 Miles on the Colorado Trail!!
Central America. 6 Weeks. 4 Countries. $2650. Part 5 – How to Plan a Trip to Central America

That’s right!
We went to Central America for 6 Weeks, visited 4 Countries, and spent $2650 per person.
And you can too!!
Part 5 – How to Plan a Trip to Central America
Step 1: Determine Your Time Frame
Although Central America looks small, don’t assume that a couple weeks will be enough time to get from one end to the other. Sure, you can get from end to end in that time frame, but you’d spend most of your time in Central America on a bus. Figure out how much time you have to travel. Note: Dry season is November through May.
Step 2: Determine Your Budget
If you’re looking to go to a lavish all inclusive resort, there are probably better websites to check out than this one for advice. If you’re looking for an unforgettable trip on a budget, read on. On both of my trips to Central America, $30 (USD) per day was a totally feasible amount to spend and still have a great time. I am sure you could operate on less than that figure in many countries, but this is a safe number.
In creating my budget for my trips, I look at it like this:
Sample Budget to Central America
Cost of Incoming Flight
+ $30 per day * number of days
+ Large Excursion Costs (Scuba diving, boat trip, etc.)
+ Travel Costs (passport, entrance / exit fees, visa costs, travel insurance)
+ Cost of Departure Flight
= Minimum Budget
Note that I wrote minimum budget meaning the minimum amount to complete your travel goals. I highly recommend padding your account beyond that number as you never know what can come up.
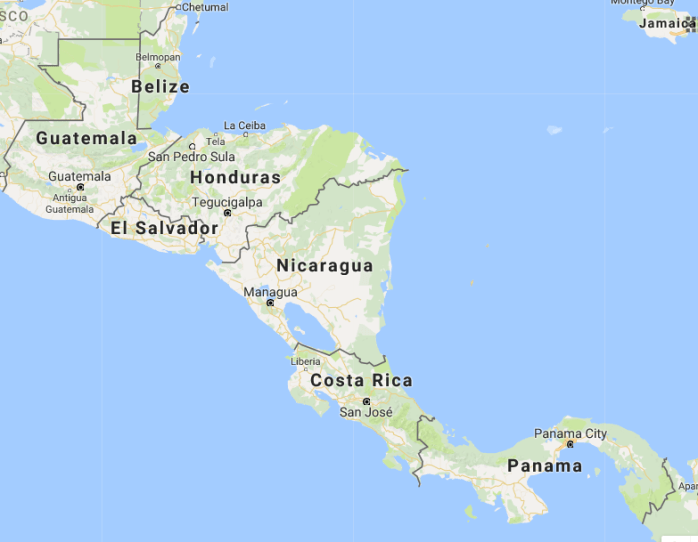
In Central America Guatemala, Nicaragua, Honduras, and El Salvador are going to be the cheapest countries to visit; while Costa Rica, Panama, and Belize are more expensive.
If you’re looking to volunteer to save some extra money, I highly recommend checking out Workaway.org. There are work exchange opportunities all around the world!
Step 3: Determine Your Travel Style
Are you comfortable being uncomfortable? Budget travel is not for everyone. Sometimes it means spending whole days and nights on crowded buses just to get from place to place only to arrive at a less than awesome hostel bunk. It means traveling with less than a week’s worth of clothes and only 2 pairs of shoes. It means asking questions and trying to understand the answer in a foreign language. It means sleeping at bus stations because your bus arrived hours later than anticipated. To me, it’s all worth it – but it is definitely not for everyone.
Step 4: Pick Out Your “Must Sees and Dos”
So, why do you want to go to Central America? Are you looking for beaches, islands, surfing or scuba diving? Or hiking, horseback riding, mountain climbing? Maybe Mayan ruins and vibrant culture? Central America is packed full of beautiful places and people. Start researching where it is you want to go and what you want to see. If you’re on a tight budget or small time frame, focus on one or two countries. The further distance you travel, the more expensive your trip is going to be.
Central America Highlights

Here’s a few of my favorite places in Central America. This is by no means all there is to see! (Click the location for my travel story from there.)
Belize
- Caye Caulker – beautiful island about 45 minutes by boat from Belize City
- Xunantunich – Mayan ruins site near the Guatemalan border
Guatemala
- Tikal – The New York City of the Maya, massive Mayan ruins site in the rain forest complete with monkeys
- Antigua – Historical small city west of Guatemala City
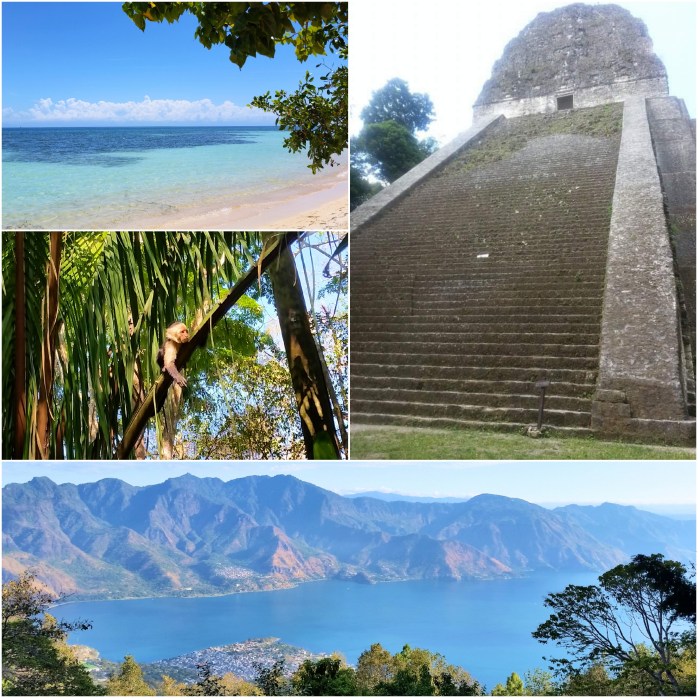
- Lake Atitlán – Gorgeous lake surrounded by volcanoes, 5 different lakeside villages with vibrant Mayan culture. Many nearby trekking opportunities.
- Semuc Champay – Ok, I haven’t actually been here, but everyone says its a must. Check out this underground river with cave exploration.
Honduras
- Utila – Carribean Island Paradise. One of the cheapest and most beautiful places in the world to learn to scuba dive
- Copán Ruinas – Intricate Mayan Ruins Site
El Salvador
- Playa Tunco – Surfer’s paradise with world renown waves
Nicaragua
- Leon – Historical city with beautiful churches. Nearby ash boarding (like sledding down a volcano)
- Ometepe Island – Island in the middle of Lake Nicaragua that is composed of two volcanoes. Must.
- Corn Islands – Never been, but highly recommended by another friend. Another slice of island paradise.
Costa Rica
- Uvita – Small beach side town
- Osa Peninsula – Near the Panama border, this peninsula is full of wildlife. Check out Corcovado National Park and see all the wildlife this country has to offer.
Panama
- Panama City – This large city has so much to offer. Go check out the Panama canal. It is mind blowing.
- San Blas Islands – If you are crossing between Panama and Colombia, spend a day (or more!) on the San Blas Islands eating fresh caught lobster and enjoying tropical paradise.
Step 5: Research, research, research!!
So many people ask me, so how did you know there would be a bus from A to B?? Um.. I googled it. Yes, seriously. All of my trips have been researched for hundreds of hours before I take off. I read lots of blogs, maps, and bus schedules before taking off. You have the whole world at your finger tips. Use it!
Make sure to read into the passport, visa, and vaccination requirements for all the countries you plan on visiting and take action months before take off. Many countries require an entrance and/ or exit fee when crossing borders. Don’t forget to account for these expenses in your budget!
The primary language in Central America is Spanish! You do not need to be fluent in the language, but the more key words you can learn in advance, the easier you will be able to get around. At the minimum, get a grip on the numbers. How will you know you’re not getting ripped off if you don’t know the numbers? As always, Por Favor (please), Gracias (thank you), and a smile will get you a long way. The people there are generally nice, and they tend to know where the travelers are headed.
Step 6: Book it!
I prefer to have my incoming and departure flights booked ahead of time. This is not necessary, but does give you the peace of mind of having your way back home already figured out. Once my start and end points are determined, I can create a travel trajectory seeing the most important things on my way. Many travelers like to leave their trips open ended to allow, well, anything to come up along the way. You do not need to book your departure in advance, but this is my preference.
(Note: Some countries require a departure ticket upon arrival. Make sure you are prepared at customs.)
Step 7: Go Explore!!
The day you’ve been waiting for has finally arrived! Enjoy the lakes, beaches, islands, volcanoes, mountains, wildlife, culture, history, and amazing people of Central America. There is much more to see and do that can fit into one trip. After visiting Central America twice, I cannot wait to go back and do more exploring!
Have you been to Central America? What are some of your must-sees and dos? I’d love to hear your input in the comments!
Follow Along
Central America. 6 Weeks. 4 Countries. $2650. Part 4 – Belize

That’s right!
We went to Central America for 6 Weeks, visited 4 Countries, and spent $2650 per person.
(And you could too!)
Here’s where we went and what we did!
Part 4: Belize
Getting In
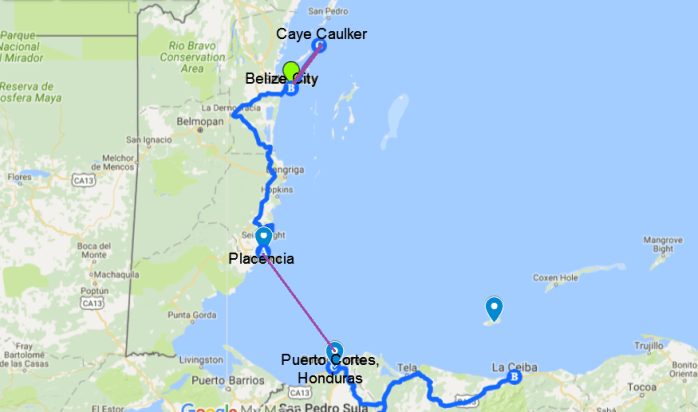
Coming from Honduras, we took the Pride of Belize from Puerto Cortes to Placencia. This boat saves a ton of time compared to crossing from overland. This boat only runs on Mondays at 11:30 am and costs about $60 per person.
Placencia
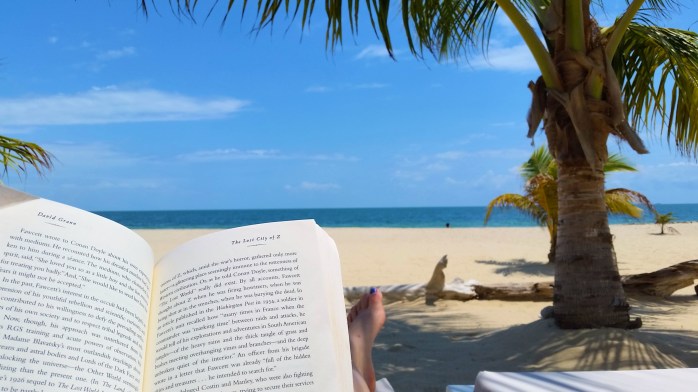
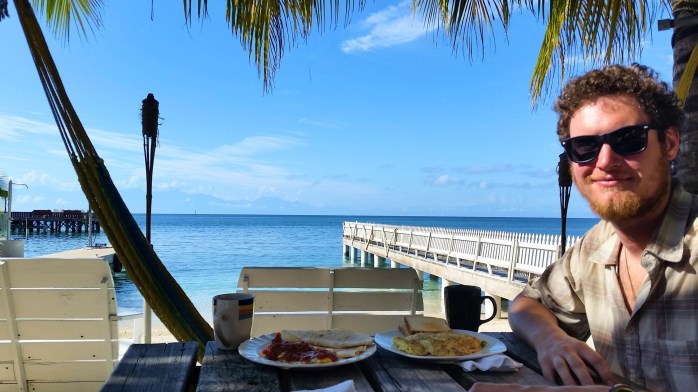
We arrived in Belize with 5 full days to spare until we were flying back to the USA out of Cancun airport. Since our boat landed us in Placencia, we decided to stay in this town. This town is a bit out of the way for the traditional backpackers, but we quite enjoyed taking it really easy for our final week in Central America. I mean, what’s better than books, beers, and a basically private beach?
Placencia Overview
- Accommodation – There weren’t too many budget options in this little town. We got a private room for $35 (USD) per night and had full kitchen access where we cooked most of our meals.
- Transportation – Placencia can be reached by bus from Belize City in about 3 hours. We ended up here by boat from Puerto Cortes, Honduras. Once we were here, all services and the beach were a short walk away.
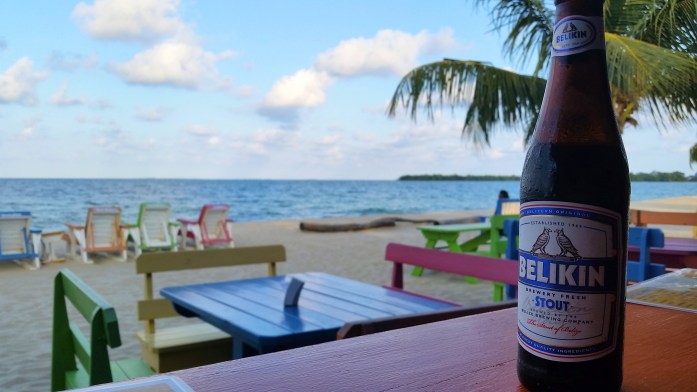
- Food – Food is a bit more pricey here. Expect to pay $5-$10 in a restaurant. We cooked most of our meals to save some money.
- Entertainment – Beach, boating, kayaking, stand up paddle board, diving, snorkeling, Mayan ruins excursions, swimming, wildlife viewing
Getting Out
We left Placencia the day before our flight from Cancun and headed to Belize City early in the morning. Upon arrival, we went to the bus station and bought tickets for our bus. We still had about 12 hours to kill before our overnight bus would take us directly to the Cancun airport. (Note: If you want to visit Belize, you can save hundreds of dollars by flying into Cancun and taking a bus instead of flying directly into Belize. I’ve done this twice now with no issues.)
Belize City is not exactly known for its tourists attractions and is actually a little sketchy. We didn’t have any plans made to kill time so we grabbed some food and beers. Not long after, a tour guide on his day off befriended us. He bought us a round and offered to spend the day with us on the pier while we waited for the bus. Well, why not?

After a marathon day of drinking, we boarded our final bus with rosy cheeks and made our way to the airport. We left at about 11:00 pm, arrived at customs a few hours later, and made it to the airport at about 7:00 am. By 10:00, we were USA bound with this whole Central American adventure behind us.
Belize Overall
On this trip, we only visited Placencia with a layover in Belize City. I wish we would have revisited one of my favorite places in the world – Caye Caulker. Just a 45 minute boat ride out of Belize City, Caye Caulker is a backpacker’s island paradise. The jewel tone crystal clear water, the lobster, the Rasta vibe, and the affordability make it a must mention in this article. Check out my visit here from my first trip to Belize. If you’re going to Belize, do yourself a favor and add Caye Caulker to your itinerary!
This country has so much to offer from the islands to the rain forest, Mayan ruins, jaguar reserves, and a peaceful vibe. This little country tends to cost a little more than its Central American neighbors. With Cancun airport being so affordable, you should definitely squeeze in a few days enjoying this unBelizable country!
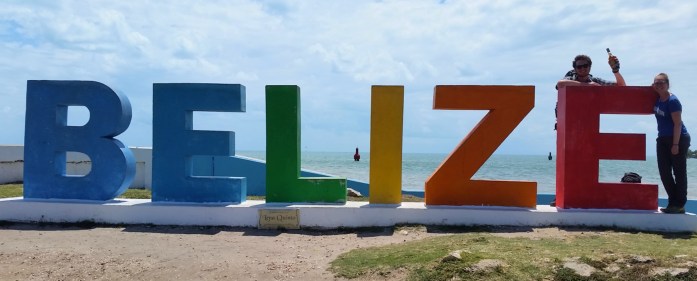
(Psst… I included some pics below from my 2014 trip to show a little more of the country.)
Next Up: Part 5 – How to Plan a Trip to Central America
Follow Along!
Colorado Trail – 104 Miles from Denver to Breckenridge

Over 8 Days, we hiked 104 miles from Waterton Canyon outside of Denver to the resort town of Breckenridge on the Colorado Trail and are enjoying every mile! Check out our experience on Segments 1 through 6 on the trail!

Day 1 – 8.1 Miles
The Northern Terminus of the Colorado Trail (CT) is in Waterton Canyon just outside of Littleton, CO. At 5515′, this is the lowest elevation of the entire trail. The trail winds six miles through this beautiful canyon, and we continued two miles further to camp near a creek. In early July, the sun was out in full force hitting 95 degrees with zero shade. Bring plenty of water, a hat, and sunscreen! Keep your eye open for bighorn sheep. We caught a family of four crossing the ricer and climbing up the canyon.
Day 2 – 13.2 Miles
Leaving the creek, we hiked a dry 8 miles to the next water source, the South Platte River. We spent a long afternoon enjoying the river, soaking our feet, and stocking up for a long 14 mile stretch without water. A good rule of thumb is to bring 1 Liter of water per every 4-5 miles of hiking for drinking water. Any water for cooking and cleaning needs to be added to this number. We left with 4 Liters per person to be on the safe side.

Day 3 – 14.7 Miles
We woke up early to make it to the next water source and enjoyed a leisurely afternoon resting by a creek and exploring a nearby cave! We started to see lots of cyclists out sharing the trail as well as hikers. The terrain continues to grow more and more beautiful and less exposed.

Day 4 – 11.5 Miles (Bailey)
We hiked an early four miles to a road crossing to get to our first small resupply in the tiny town of Bailey (mile 40.5). Bailey has about 5 businesses of use to hikers – a grill, diner, Chinese restaurant, gas station with convenience store, and 2 dispensaries. Oh, Colorado. We successfully ate a vegan breakfast at a diner (who knew that could be done) and did our light resupply at the gas station. We waited out the near daily afternoon rainfall and hitched back to the trail.
After our town stop, we encountered beautiful aspen forests whose knots make it feel like your being watched. Then, we began our toughest climb yet, a grueling 3000 feet over 7 miles, only getting steeper near the summit. We finished our climb proud of our work and camped at 10,656 feet above sea level.
Day 5 – 17 Miles
We were thankful the following day did not include any crazy climbs or descents and were able to hike 17 miles through Pike National Forest. The day began in the meadows of Lost Creek Wilderness where we enjoyed following cows down the trail and tons of gorgeous wildflowers.

Day 6 – 13.2 Miles
We awoke early from our campsite near a creek and hiked about 6 miles to stunning 360 degree views of nearby Kenosha Pass. This trail seems to get more and more beautiful as we hike! We skipped the town stop of Jefferson / Fairplay (mile 71.7) and continued into the forest.
We found a great camping area near a creek and settled in for our lunch break. The clouds looked like an afternoon rain so we decided to pitch our poles, tent footprint, and rain fly and waited out the storm. We were happy with our decisions as the rain came down for nearly two hours – enough time to listen to a String Cheese Incident show and take a light nap 🙂 . After our break, we continued a few more miles to camp very happy that we decided to stay dry.

Day 7 – 20.1 Miles
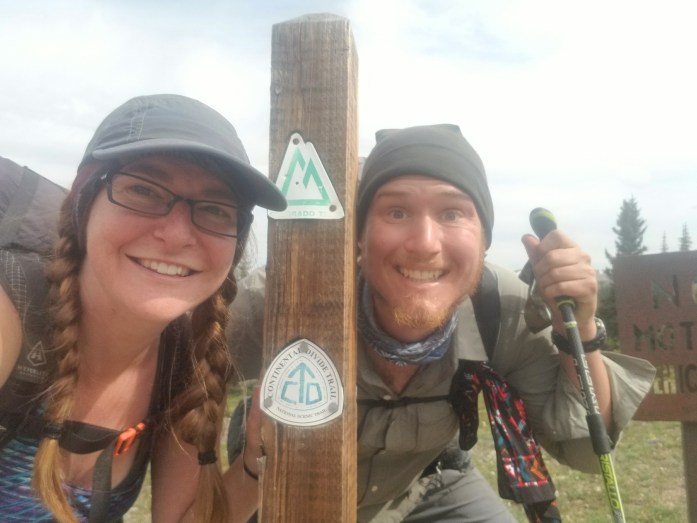
We broke camp early and started hiking our way up Georgia Pass. Wow, Colorado. At the top, we took a few quick pictures, but pressed on to get out of the wind. Soon after the pass, we saw our first Continental Divide Trail (CDT) crest as the CT and CDT coincide for about 235 miles. As aspiring triple crowners, our hearts were soaring upon first glance of the crest. See you next year, CDT!

We meandered down from the pass and took our afternoon break by a creek. Since we were anticipating dry camping, we decided to make our cooked meal for lunch instead of dinner. Though it was delicious, it did not help with our steep 1000 foot afternoon climb. After the pass, we found a campsite with an amazing view just six miles outside of our first town stop, Breckenridge. We got our tent pitched just in time for the rain to start falling which it continued to do until the morning. Thankfully, our tent kept us and our things perfectly dry.
Day 8 – 6.3 Miles
In the morning, we packed up our wet tent and made our way down the mountain into Breckenridge. About halfway through our morning hike, we spotted a moose with two calves only ten feet from the trail. Startled, one calf took off into the woods, the other stayed by mom, and mom (over 7 ft tall!) was on defense. We scurried by knowing momma moose could charge us if she wanted to. No time for pictures.
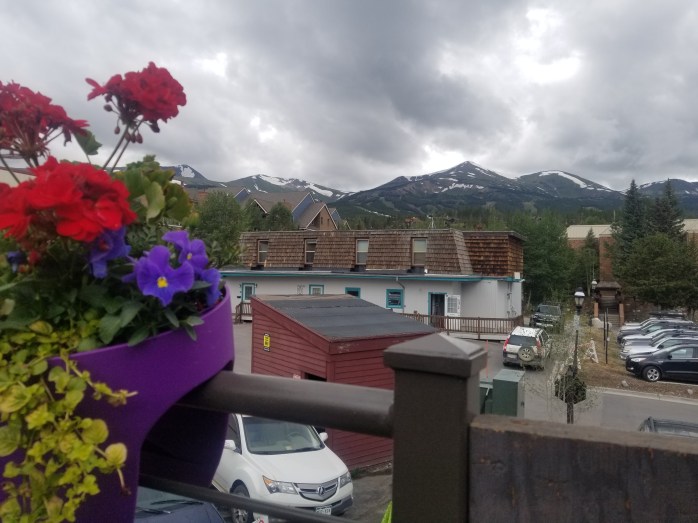
We made it to the highway around 10 am and were stoked that the trail was right by a free bus ride into town. No hitchhiking necessary. Ahh, Breckenridge, what an ideal trail town! We splurged on a private hotel room, enjoyed the Continental Divide Winery Tasting Room, Thai food, and vegan pizza from Piante Pizzeria.
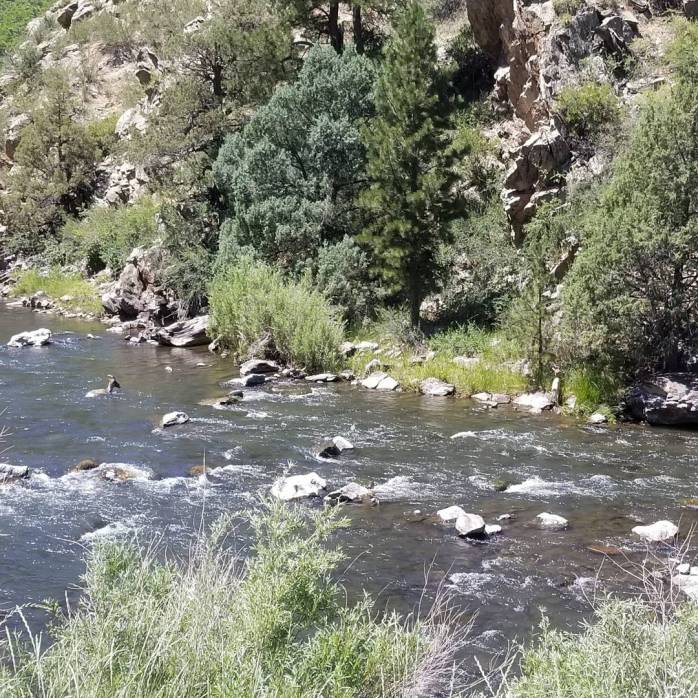
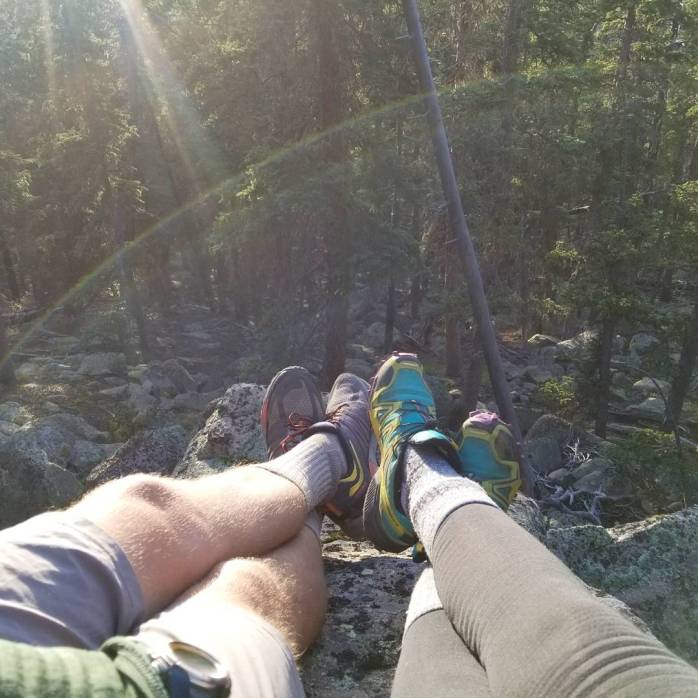
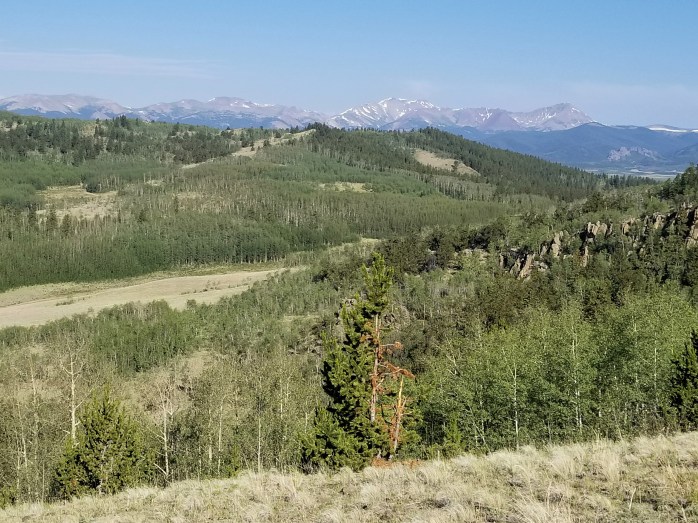
104 miles down, 382 left! So far, so good. We are totally in love with this trail and new adventure!! Check out a few more pictures below!
Let’s Connect!
Central America. 6 Weeks. 4 Countries. $2650. Part 3 – Honduras

That’s right!
We went to Central America for 6 Weeks, visited 4 Countries, and spent $2650 per person.
(And you could too!)
Here’s where we went and what we did!
Part 3: Honduras
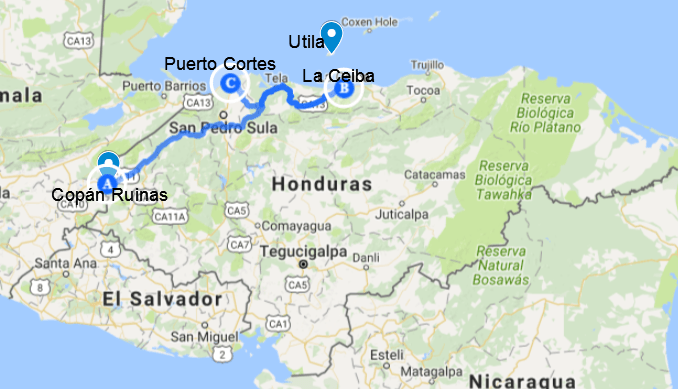
Getting In
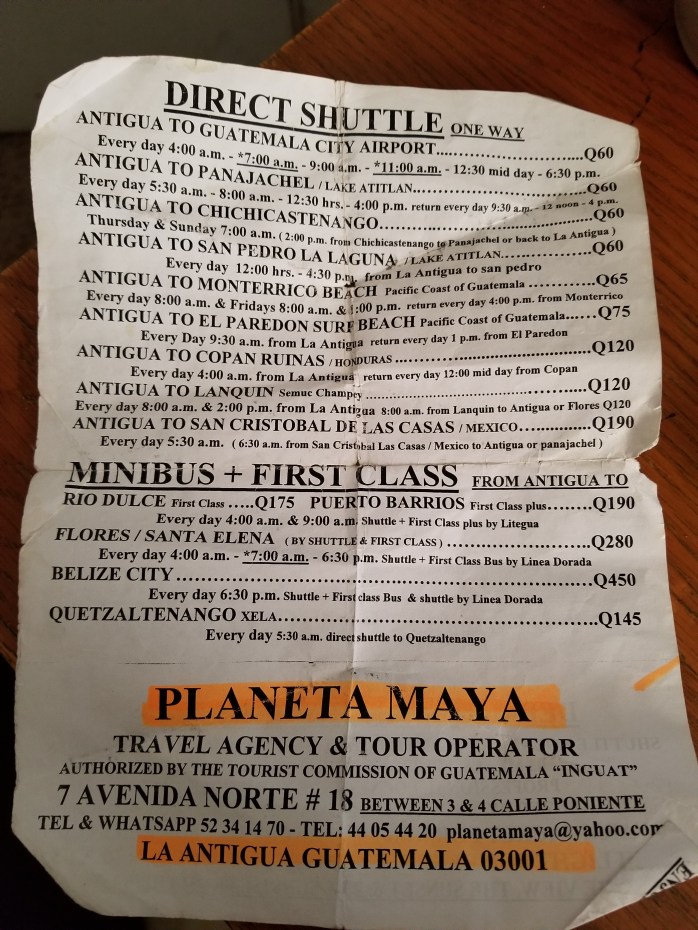
Coming from Guatemala, we took a direct shuttle from Antigua to Copán Ruinas to begin our adventure in Honduras. Crossing borders was very simple, and the shuttles are far more comfortable than a bus. Based out of Antigua, Planeta Maya has the best shuttle rates around.
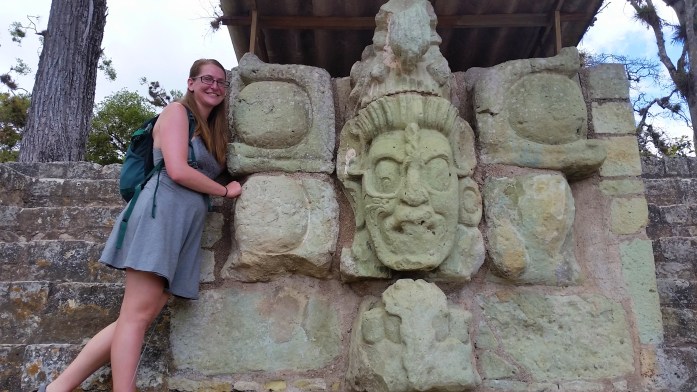
Copán Ruinas
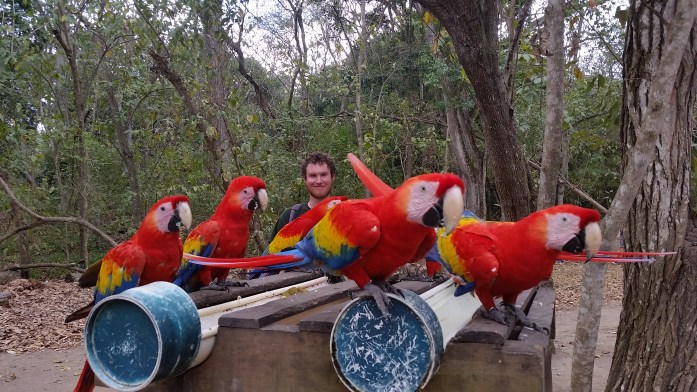
Our first stop just east of the Guatemala – Honduras border is the small town of Copán Ruinas. Mayan ruins are a must see while in Central America. This site is definitely not the largest, but it is by far the most intricate ruins site I have ever seen. All the rocks are artistically carved with beautiful symbols and designs, and the surrounding rain forest is full of birds including scarlet macaws!!

Copan Ruinas Overview
- Accommodation – We found a private room for ~$10 total per night. There are a few choices in this small town – all budget friendly.
- Food – Restaurant meals were $5 or less for full meals
- Transportation – All town services are within walking distance. Take a tuk tuk to the ruins for about a dollar. There are connecting buses to Guatemala, San Pedro Sula, and the capital Tegucigalpa.
- Entertainment – The ruins are the main highlight here which you can see all of in one day. Other activities include horseback riding, nearby hot springs, and spa.
Utila
***TRIP HIGHLIGHT***
After a couple nights in Copán Ruinas, we made our way to San Pedro Sula’s bus terminal and caught a connecting bus to La Ceiba (about 8 hours total travel time). We made it just in time for the last ferry of the day from mainland Honduras to the Bay Island of Utila. The bay islands are a slice of paradise, and Utila is made for those traveling on a budget.
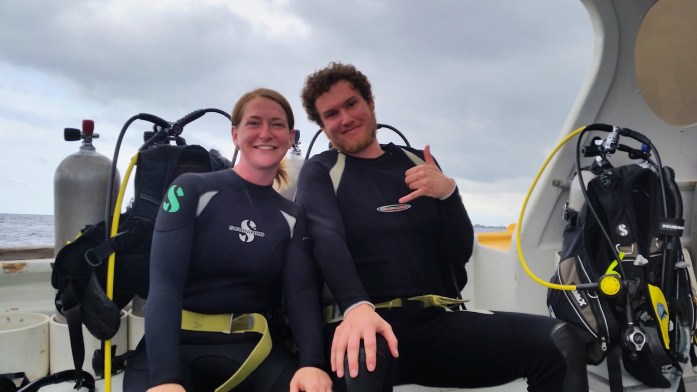
Have you ever wanted to try scuba diving?
Utila is one of the cheapest places in the world to get PADI certified. There are dozens of dive shops, dive sites, and miles of reef to explore. Add in tropical fish, dolphins, and whale sharks to make this a scuba diver’s dream come true!! Scuba diving has been on my bucket list for quite some time. This whole Central America adventure was based on learning to scuba dive.
My internet research led me to Utila Dive Center (UDC), perhaps the most reputable dive center on the island. We signed up for PADI Open Water Certification classes in advance via the UDC’s website. I knew scuba diving was going to be our “big splurge” on this trip, but I couldn’t believe I found such an amazing deal. The Open Water Certification classes, equipment rental, study material, tanks, 2 bonus fun dives at the end of the class, and 5 nights dorm accommodation at the Mango Inn was $329 per person. !!!!!!!!!!!!!!!!.
Our certification course consisted of classroom work, shallow deck dives learning techniques, four boat dives, and two bonus fun dives after we were certified. Let me tell you, I will never ever forget my first breath under water. At that moment, we were both unsure if scuba was “for us.” I’m so glad neither of us bailed because after that first shallow dive, every dive got easier and easier. By the end of the course, we were totally in love. Scuba diving allows you to experience a whole new world under the water’s surface. There’s truly nothing like it.
Not only is Utila budget friendly, the island is part of the Mesoamerican Barrier Reef System, the second largest reef in the world next to the Great Barrier Reef. After our course, we visited the “Labyrinth” dive site where we swam between massive reef walls and under reef arches.
Utila is also home to hundreds of tropical fish species, eels, turtles, dolphins, and whale sharks. Seen on the sign below, whale sharks are the world’s largest fish. They are docile, and you can swim with them safely. I was a little bummed we didn’t see any on this trip, but it just gives me more motivation to return!

Utila Overview
- Accommodation – Our stay was included in our dive package. There are plenty of hostel bunks starting at $6 / night. There are also some affordable, swanky looking AirBnB’s out there. If you have a group, this could be the way to go in style.
- Transportation – From La Ceiba on the mainland Honduras, there are two daily connecting ferries. We went from Copán Ruinas, switched buses in San Pedro Sula, arrived in La Ceiba, and boarded a ferry to Utila all in the same day. Once on the island, everything is in walking distance. There are bicycles, motor bikes, and ATVs for rent all over the island.
- Food – Not surprisingly, there is an abundant amount of seafood here! We ate at restaurants for $3-$6 for a full meal. For the thrifty traveler, grab some baleadas from a street vendor which consist of homemade tortillas with bean spread, cheese, and pickled onions plus your choice of extra toppings (meat, avocado, veggies, etc). The basic version will cost about $0.50.
- Entertainment – The main highlight here is scuba diving but you can also snorkel, free dive, swim, beach, fish, kayak, ride bikes or atvs, hike
Getting Out
Leaving was mildly heartbreaking, but we took the ferry back to the mainland and hopped a bus from La Ceiba to San Pedro Sula. At the bus terminal, we switched buses and headed to Puerto Cortes. We spent the night and headed to the docks in the morning to grab a boat over to our next destination: Belize!!
(Note: The boat from Puerto Cortes, Honduras to Placencia, Belize only runs on Mondays and costs $60 per person. It will save you quite a bit of bus time and only cost slightly more than traveling overland from Honduras to Belize.)
Honduras Overall
Despite its reputation, Honduras was quite enjoyable. We loved the Mayan ruins of Copán and found paradise on the bay island of Utila. I will note that many backpackers skip Honduras because of its history of violent crime. That being said, we were warmly welcomed for the most part. Many strangers kindly answered our questions while in the bus station, and we were never anywhere we felt unsafe. Always use your best judgement, stay in good areas, and use common sense. We made it through the bus station in the world’s most dangerous city, San Pedro Sula, twice on our way to and from Utila. It can be done.
I had a wonderful time in this country, and I look forward to going back!
(Note: There is a small airport on the island of Roatan just east of Utila with a connecting ferry. If you have the money, you can skip the buses and fly directly to the bay islands.)
Next Up: Part 4 – Belize
Follow Along!
How to Make Dehydrated Backpacking Food

We are oh so excited to begin the 486 Mile Colorado Trail in just seven days! This year, we upped our trail food and nutrition diet by making our own dehydrated backpacking meals!
How it Works
- Prepare and Cook Food
- Spread food onto dehydrating trays in thin layers. If your food would drip through the trays, use parchment paper as a tray liner.
- Dehydrate. Dehydrators come with instructions that indicate what temperature to use for certain foods as well as a time estimate.
- Wait! Most of our batches took 10-15 hours to be fully dehydrated.
- Vacuum seal meal portions.
- When on trail, re-hydrate with water and heat.
- Enjoy a nutritious, home cooked meal at a fraction of the price of freeze dried alternatives.
What You Need
- Food Dehydrator
- Parchment Paper
- Prepared Meal
- Vacuum Sealer and Bags
- Time!!
- A Trail 🙂
Dehydrating your own food is actually quite simple, but it does take quite a bit of time. It took us about 5 weeks to create 57 dinners for two, and we used two dehydrators! If you are making a large amount of meals, start well in advance.
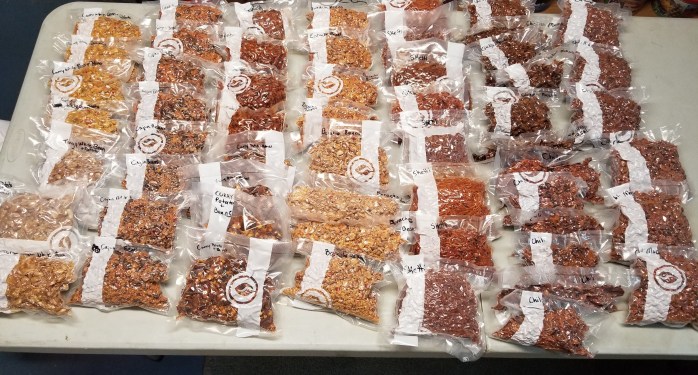
Portions
We found that filling a 6 Qt Stock Pot mostly full would yield four dinners for two (8 portions). We measured out 1.5 cup portions and spread one portion per tray in thin layers. I measured the amount of food after it had been dehydrated, and noticed the volume changed by about 3/4 cup. On trail, I will start re-hydrating with less water than anticipated and add until I achieve the desired consistency.
What to Make
You can cook and dehydrate basically whatever you like. Our meals tend to be made of any bean (white, garbanzo, black, kidney, etc) and finely chopped vegetable in some sort of sauce. We added cooked pasta to some meals, and others we intend to add minute rice cooked in the back country.
While you can cook and dehydrate just about anything, here are some things to avoid:
- Oily Foods
- Nuts and Seeds
- Avocado
Note: Any food you put into your dehydrator must be fully cooked beforehand. So if you are making beans, canned beans are fine, but a dried bean must be fully cooked before it can be dehydrated.
Meal Ideas
We made 100% vegan dehydrated meals for the trail to fit our diet. I can’t speak from personal experience with animal products, but there are many sources that indicate that meat dehydrates just fine. I would assume that meats lower in fat and grease would dehydrate better than greasy meats. All of the meals below we made without any animal products.
If you’d like to know more about backpacking on a vegan diet, check out a full article on vegan backpacking here.
Note: These are not formal recipes. I included the ingredients and seasonings we use so that you can modify quantities to your liking. For us, it worked well to fill a 6 Qt Stock Pot mostly full which yielded 8 – 1.5 cup portions. I recommend making thicker soups with little broth. I also recommend over seasoning for a better flavor once the meal is re-hydrated on trail.
Powerhouse Breakfast
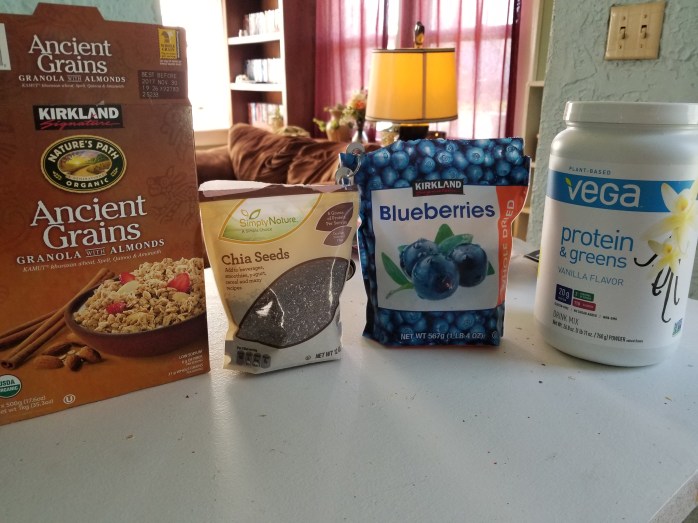
Ingredients
- 1/2 cup Granola
- 1 tbsp Chia Seeds
- 2 tbsp Vegan Protein Powder
- 2 tbsp dried fruit
Add all ingredients to vacuum bag and seal. On trail, add 1/2 cup water. Approx 400 cal and 17 g protein per serving as is. After you add at water and the powder is dissolved, we like to add a spoonful of peanut butter for extra nutrition and to cover up the taste of the protein powder.
Chili / Chili Mac
![IMG_20170529_124638_258[1]](https://infinitegeography.com/wp-content/uploads/2017/06/img_20170529_124638_2581.jpg?w=698)
Ingredients
- Canned Beans (Chili, Kidney, Black), drained
- Canned Tomatoes (Crushed, petite diced, tomato paste)
- Finely Chopped Yellow Onion, Bell Pepper, and Garlic
- Frozen Corn
- Seasonings: Chili Powder, Cumin, Cayenne Pepper, Crushed Red Pepper, Garlic Salt, Salt and Black Pepper
- For Chili Mac, add cooked elbow macaroni
Saute onion and bell pepper in a little vegetable stock, add garlic last. Add all other ingredients and seasoning.
Boracho Beans
![20170603_120421[1].jpg](https://infinitegeography.com/wp-content/uploads/2017/06/20170603_1204211.jpg?w=4032)
Ingredients
- Pinto Beans, drained
- Finely Chopped Onion, Red Bell Pepper, Garlic
- Canned Chipotle Peppers (Would not recommend using the whole can! 1 or 2 peppers will do it.)
- Dash of White Vinegar
- One Light Beer
- Tomato Paste
- Seasonings: Salt and Pepper
Lightly saute onion and bell pepper in a little vegetable stock, add garlic to saute last. Add all other ingredients.
Chickpea Masala
![20170603_194231[1]](https://infinitegeography.com/wp-content/uploads/2017/06/20170603_1942311.jpg?w=698)
Ingredients
- Green chiles (jalepeno), Garlic, Cilantro
- Finely Chopped Onion
- Canned Chick Peas, drained
- Stewed Tomatoes
- Coconut milk
- Seasoning: Tumeric, Cumin, Garam Masala, Salt and Pepper
Combine chiles, garlic, cilantro, and stewed tomatoes in a food processor. Transfer to stock pot and add all ingredients.
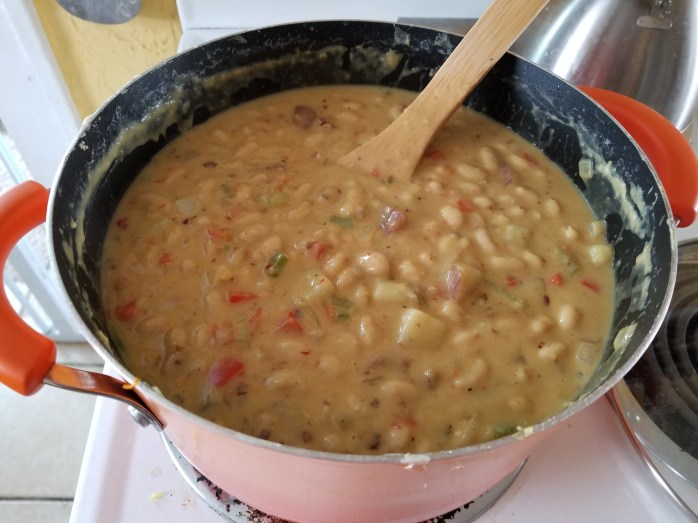
Tangy Potato and White Bean Soup

Ingredients
- Potatoes
- Canned White Beans, drained
- Minced carrot, red onion, and garlic
- Apple Cider Vinegar
- Maple Syrup
- Seasonings: Salt and Pepper
Simmer carrot, red onion, and garlic in 3 parts water, 1 part vinegar until onions are translucent. Add a dash of maple syrup. Set Aside. Boil potatoes in salted water until soft. Combine half cooked potatoes, half white beans, and the onion mixture you made into a food processor. Blend until smooth. Combine mixture with more cooked potatoes and white beans. Add salt and pepper to taste.
Curry Potato and White Bean Soup
Ingredients
- Potatoes
- Canned White Beans, drained
- Coconut Milk
- Finely Chopped Onion, Bell Pepper, and Garlic
- Seasonings: Curry Powder, Red Pepper Flakes, Salt and Pepper
Boil potatoes in salted water until soft. Combine half cooked potatoes, half white beans, and coconut milk into a food processor. Blend until smooth. Lightly saute onion and bell pepper in a little vegetable stock and add minced garlic last. Add the mixture from the food processor and more cooked potatoes, white beans, and coconut milk in stock pot. Add seasonings to taste.
Cajun Beans
![20170602_121110[1]](https://infinitegeography.com/wp-content/uploads/2017/06/20170602_1211101.jpg?w=698)
Ingredients
- Pinto Beans, drained
- Finely Chopped Onion, Bell Peppers (any color), and Garlic
- Seasonings: Cajun Seasoning, Garlic Salt, Salt and Pepper
Lightly saute onion and bell pepper in a little vegetable stock, add garlic to saute last. Add all other ingredients.
Spaghetti / Goulash
![20170617_220836[1]](https://infinitegeography.com/wp-content/uploads/2017/06/20170617_2208361.jpg?w=698)
Ingredients
- Finely Chopped Onion, Bell Peppers (any color), and Garlic
- Canned Tomatoes (Petite Diced, Tomato Paste)
- Jar(s) of Premade Spaghetti Sauce
- Spaghetti or Elbow Macaroni
- Seasonings: Italian Seasoning Mix, Garlic Salt, Salt and Pepper
Lightly saute onion and bell pepper in a little vegetable stock, add garlic to saute last. Add tomatoes, sauce, and paste. Cook pasta separately in salted water. Add cooked pasta to stock pot. Season to taste.
Central America. 6 Weeks. 4 Countries. $2650. Part 2 – Guatemala

That’s right!
We went to Central America for 6 Weeks, visited 4 Countries, and spent $2650 per person.
(And you could too!)
Here’s where we went and what we did!
Part 2: Guatemala
Getting In
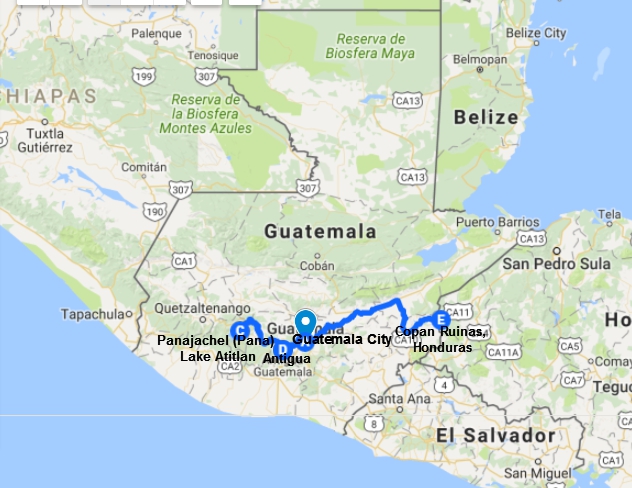
We found a steal of a deal on a flight from San Jose, Costa Rica direct to Guatemala City for $60 using Kayak.com. Guatemala City has somewhat of a bad reputation for crime so we weren’t trying to hang out there. Once we landed, we haggled with a few taxi drivers to get a good rate on a ride to Antigua. We scored a ride for $10 each. There are multiple daily shuttles from the Airport to Antigua as well. From what I’ve researched online, they run $12-$15 per person. I considered our cab fee a score!
Antigua
No trip to Guatemala is complete without passing through this historical city. If you’re looking for vibrant culture, cheap food and drinks, all while surrounded by volcanoes, Antigua will not disappoint!
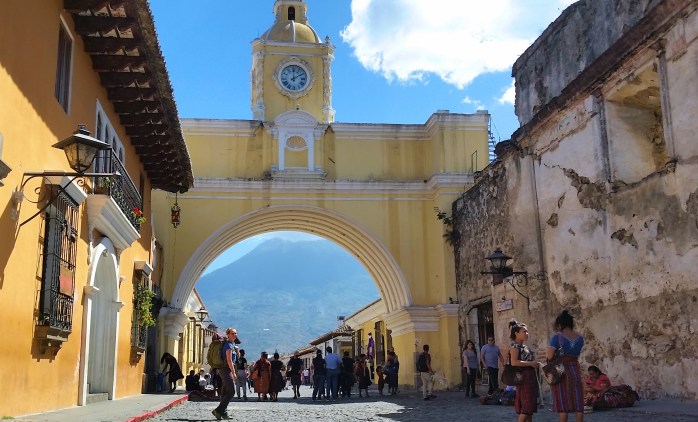
Upon arrival to Antigua, we decided to wing it and didn’t book a hostel in advance. It was not very long before we stumbled into Hostel Roo and found bunks for 50 Q (~$7) / night!! They also accept volunteers if you’re looking to save some extra cash.

We spent our days in Antigua roaming the cobblestone streets, eating fantastic street food, exploring the Cacao museum, and drinking really, really cheap drinks. There are many tour agencies here that have shuttles to get you to your next destination.
Pro tip: If you speak some Spanish, this is your place to haggle! Don’t be afraid to make an offer at the market or a tour agency. You can definitely save some Quetzales by haggling!

Antigua Overview
- Accommodation – Hostels start at $5 for a bunk!
- Food – Restaurant meals for under $5. Street food can be as little as $1 and less for snacks! Cooking your own food will always save you money. The price of produce at the markets will amaze you!!
- Transportation – Take a tuk tuk around the town for under $1. Most attractions are within walking distance. Antigua has several tour agencies with shuttles to connect you to your next destination.
- Entertainment – Historical Sites, Cacao Museum, Parks, Cathedrals, Volcano Hikes, Shopping, Walking Tours
Lake Atitlán
**TRIP HIGHLIGHT**
I’m in love with this Lake, the people, the volcanoes, did I mention the price?
From Antigua, we took a two hour shuttle for 70Q (~$10) per person to Panajachel (Pana). From there, we took a boat (see above) across the Lake for 15 Q (~$2) to San Pedro. There are 5 different villages around the Lake each with their own different feel. We chose San Pedro based off of a friend’s recommendation, and it did not disappoint. (Check out her blog here!)

We stayed five nights at Hotel Peneleu for 40Q (~$6) / night for a private room!!! That’s total, not per person. Insane!! We ate most of our meals in restaurants for under $5 per person per meal. Beers or cocktails? ~$1-2. Seriously. Can I go live there now?

Wow, our six days here flew by! We spent our time roaming the streets, eating amazing food, sipping on local coffee, shopping, and hiking! One day, we took a tuk tuk to the trail head for Volcan San Pedro. Note: You do not need to pay a guide! The entrance fee (100Q ~ $13) to the trail includes a guide for the first few kilometers. The rest of the trail is very easy to follow to the top of the volcano for incredible views of the lake.
The Lake is also a very popular spot to take Spanish lessons while living with a family. There are various programs, all very affordable, that will totally immerse you in Mayan culture while learning Spanish. All levels will find classes to suit your needs. I couldn’t recommend this place higher if you’re looking to develop you language skills!
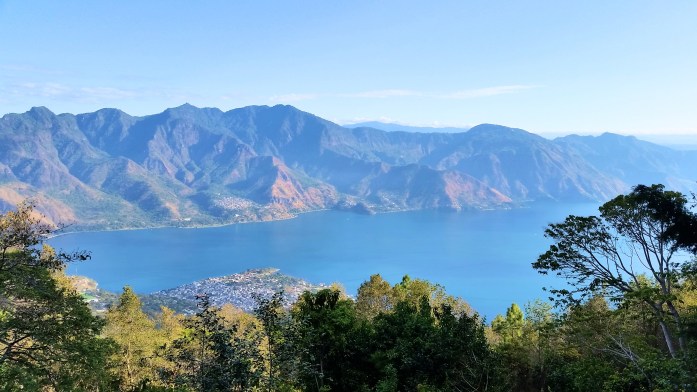

Lake Atitlán Overview
- Accommodation – As little as $4 for a hostel bunk. Nice hotels for $30-40.
- Food – Very, very cheap. Restaurants starting at $2, cocktails and beers for $1-$2. Markets unbelievably affordable for produce. Get some local coffee as a great souvenir!
- Transportation – Once you arrive on the lake, boating across is very simple and cheap. In the village, everything is accessible on foot or get a tuk tuk ride for less than $1.
- Entertainment – Kayaking, Fishing, Boating, Hiking, Shopping, Bars, Restaurants, Spanish Lessons, Culture Exchange
Getting Out
We left the Lake and headed back to Antigua to make a connection to Copan Ruinas in Honduras. Planeta Maya (picture above) had steep discounts on shuttles connecting all over Guatemala, Nicaragua, and Honduras. Crossing borders was simple!
Next Stop: Honduras!
Guatemala Overall
I LOVE GUATEMALA!! We spent a week here and came in way under our $30 / day budget. I only wish we had more time to spend. I highly recommend staying in the country longer to stretch your pennies. Antigua and Lake Atitlán are must sees! I also recommend checking out Tikál in the northern part of the country. It is one of the largest Mayan Ruin sites discovered. I loved my visit on my first trip to Latin America in 2015. I can’t wait to return to this beautiful vibrant country, and I must check out Semuc Champay some day!
Next Up: Part 3 – Honduras
Follow Along!
