
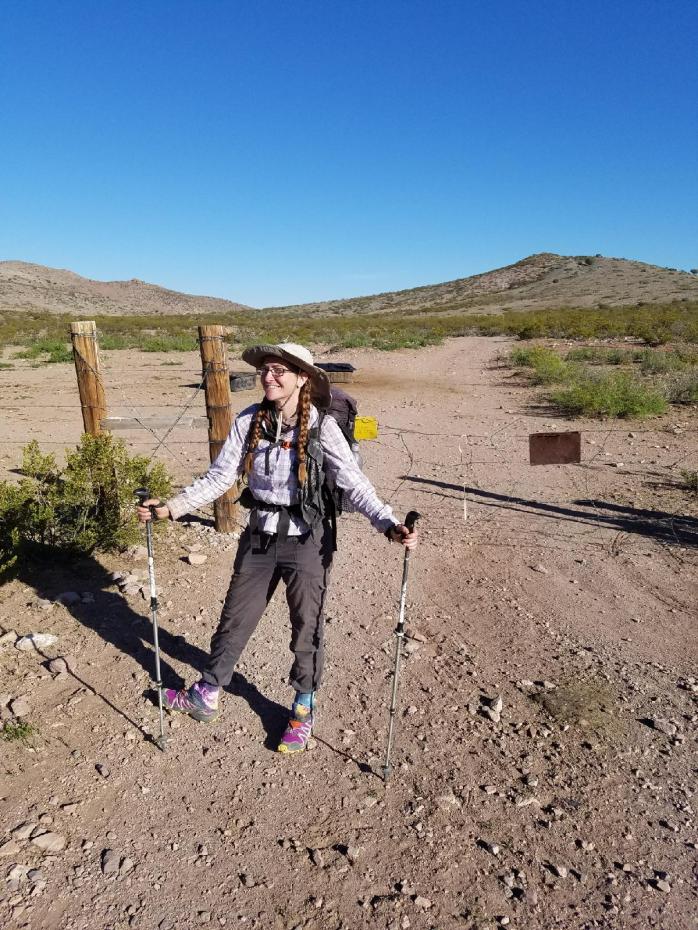
85 Miles through the Chihuahuan Desert – A Warm Welcome to the CDT

We wrapped up three busy yet fun weeks of work in catering at Coachella Music Festival April 22 (yes, I saw Beyonce’s show with 150 musicians and backup dancers 😮). We had a big day of traveling on the 24th driving from Indio to LA in classic bumper to bumper traffic, late check-in for our flight to Tucson, bags and ourselves made it to Tucson, Uber to food, last second check-in to our bus to Lordsburg (Greyhound on time – impressive), and arrived in Lordsburg approximately 12 hours before our shuttle to the terminus that would leave the following morning. We were as ready as we would get for our first 85 miles traversing the desert floor back to Lordsburg.
Day 1 – 15.5 Miles
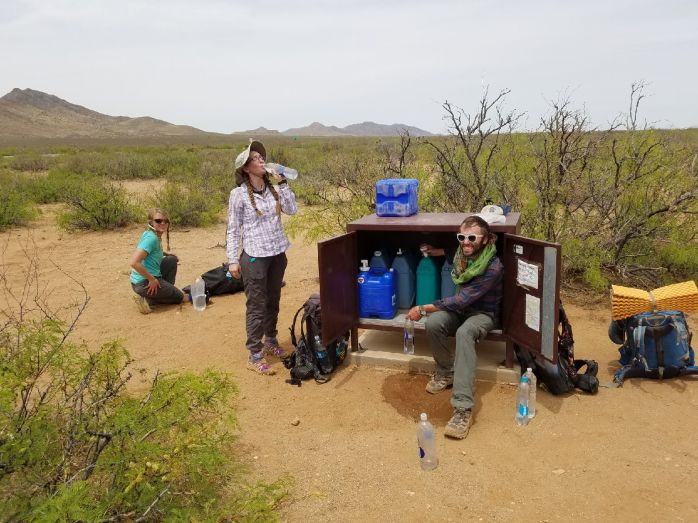
The CDTC provides a shuttle to the terminus as well as 5 water caches between the terminus and Lordsburg. The shuttle (more info here) takes about 3 hours half of which is on a 4 wheel drive access only road. Our driver, Jeffery, owns property in the area and shared his knowledge of the surrounding land as well as plant and animal life that survives the desert.
It was actually a little cloudy and around 85°F when we arrived at the terminus. We joined our old friend, Katie, and our new friend, Jake, and the four of us began our great journey north.

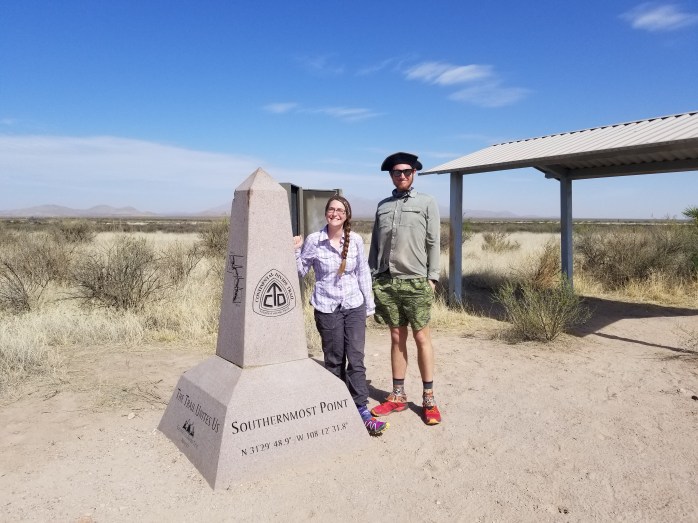


It only took me two miles to roll my right ankle which I’m currently icing. Ankle brace has been ordered 👍


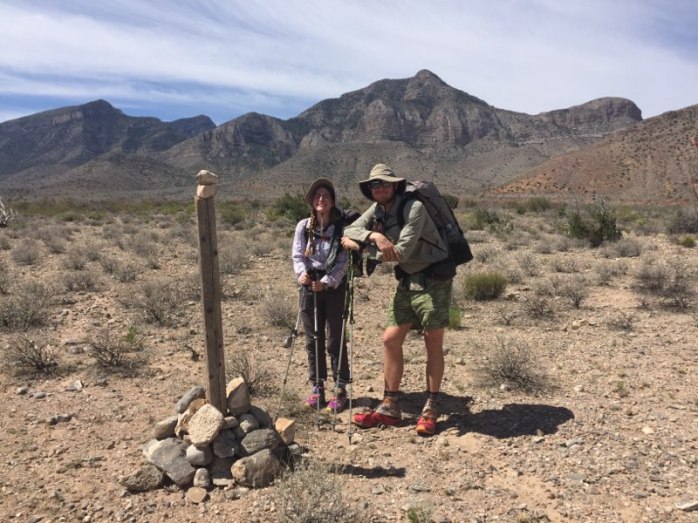
Day 2 – 17.5 Miles
Today we played find the trail moving slowly from one post to the next. The rocks on top reflect the sun making spotting the next post a little easier. I am actually enjoying being so far out in the middle of nowhere. Every time I revisit the desert, I seem to like it more.


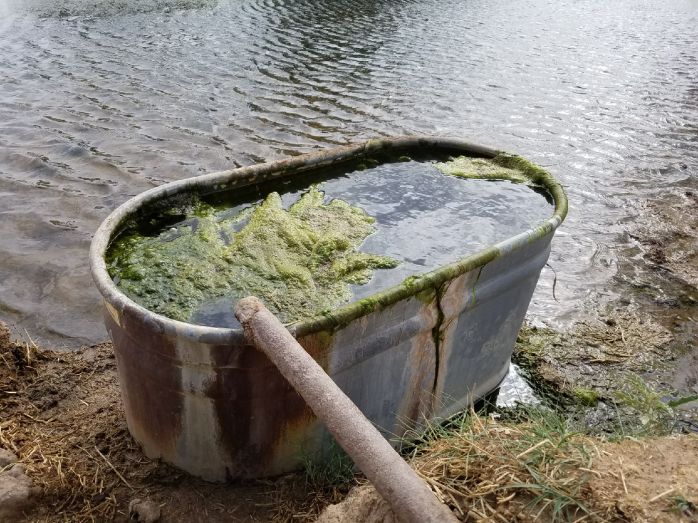
Day – 21.7 Miles
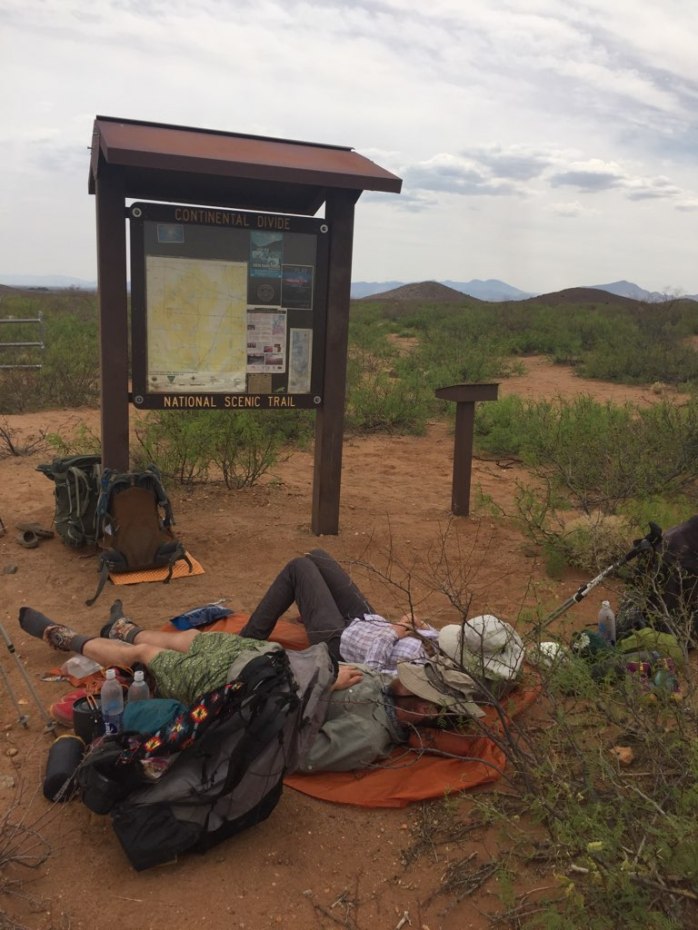
Our biggest day yet. We love hiking in the mornings and getting some miles in before the sun bakes us alive. We finished our first half of the day gathered around a water cache and enjoyed a siesta until about 4 pm. The caches are a gift from the CDTC saving us from the less than desirable cow troughs in the area. We are all so grateful!!

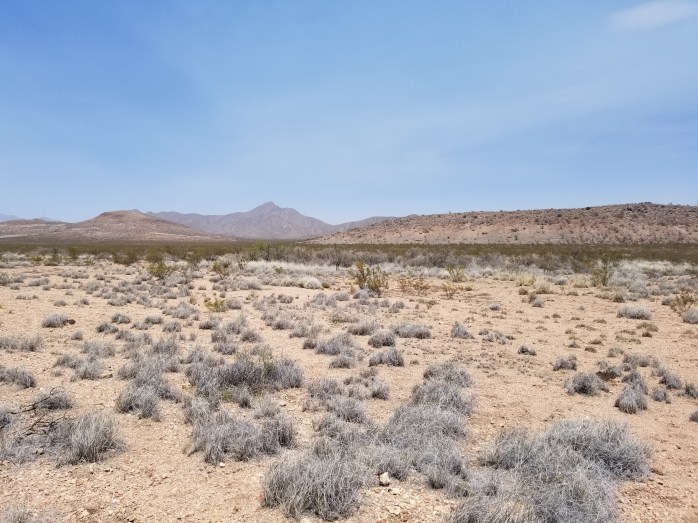
Day 4 – 17.4 Miles
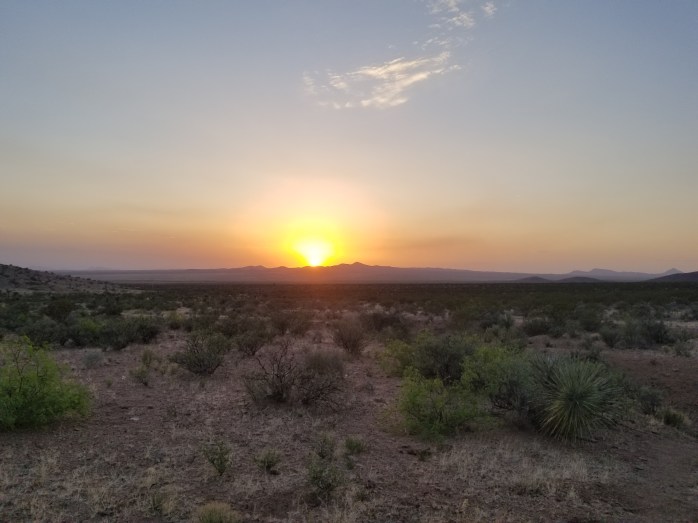
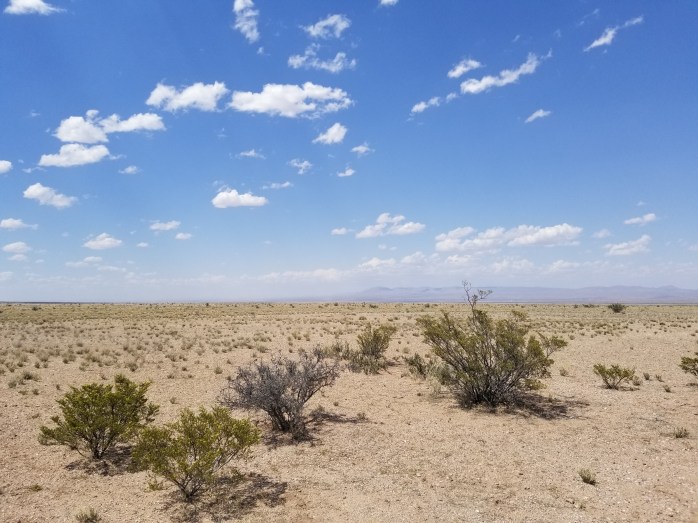
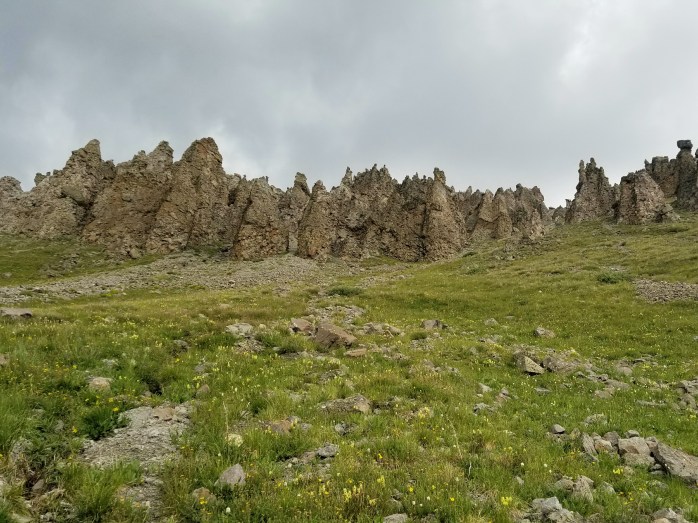
The most remote and empty day yet. We marched around the barren desert floor with nothing but rocks, sand, and the occasional cactus to distract us.


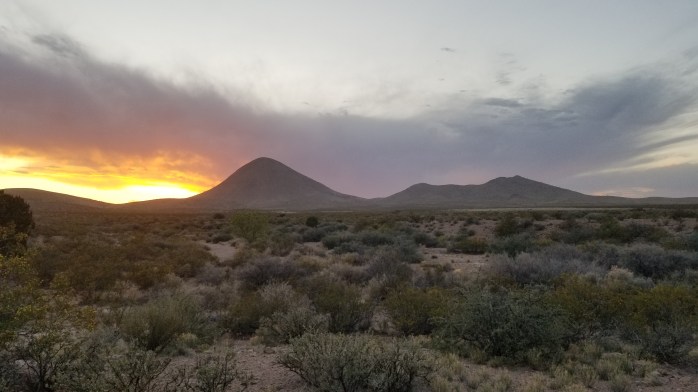
Day 5 – 12.9 Miles
Our last stretch back into Lordsburg. We got an early start in order to avoid the afternoon heat. Another beautiful day in the desert! 85 miles across the desert floor earned us some beers and a shower.


85 miles down, whatever to go. See you sometime, Canada 👣🌞🌵🌎

The Little Three: The Long Trail, The John Muir Trail, and The Colorado Trail

Have you ever considered a thruhike?
When that phrase comes to mind, I imagine many people think of the Appalachian Trail or Pacific Crest Trail both of which are over 2000 miles long and take 5ish months to hike end to end. I understand that it is overall pretty rare and mildly extraordinary that some of us are able to take off extended periods of work to chase our dream of traveling. Many people are committed to their careers and family in a way that will never allow such a thing, thus the idea of a 5 month thruhike isn’t plausible.
But what about a shorter end to end hike?
Today, I wanted to discuss the “Little Three” – three comparatively shorter trails that can be completed end to end in about month or less: the Long Trail (VT), John Muir Trail (CA), and Colorado Trail (CO). These remarkable trails are a wonderful way for you to get out there for a thruhike without sacrificing too much of your time. Each of these three trails coincide at least in part with the “Big Three” – Long Trail / Appalachian Trail – John Muir Trail / Pacific Crest Trail – Colorado Trail / Continental Divide Trail. Completing the “Big Three” is known as the Triple Crown of hiking, and the “Little Three” are sometimes called the Crown Jewels.
The Long Trail (LT)
Location: Vermont
Length: 273 Miles (439 km)
Ave. Time to Thruhike: 3-4 Weeks
High Point: Mount Mansfield – 4395 ft (1339 m)
Low Point: Winooski River Crossing – 338 ft (103 m)
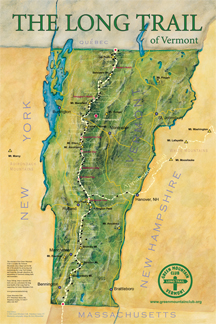
The Long Trail is the oldest long distance trail in the US. Its southern terminus is at the MA/VT border, and its northern terminus is at the US/ Canadian border. The LT can be hiked northbound or southbound. The LT coincides with the Appalachian Trail for about 100 miles from the MA / VT border to central Vermont near Mount Killington. The Long Trail winds through hardwood forests climbing up and down the Green Mountains with rugged terrain complete with rocks, mud, and mossy roots. There is no required permit for the LT. The best time of year to hike the LT is in summer and early fall. Spring and early summer are known for incredible amounts of mud in Vermont, leading to the nickname “Vermud.” We anticipate completing the entire hike one day and hope to do so in the fall to experience New England’s outstanding fall foliage. Find out more about the Long Trail on Green Mountain Club’s Website.


Sources: GreenMountainClub.org
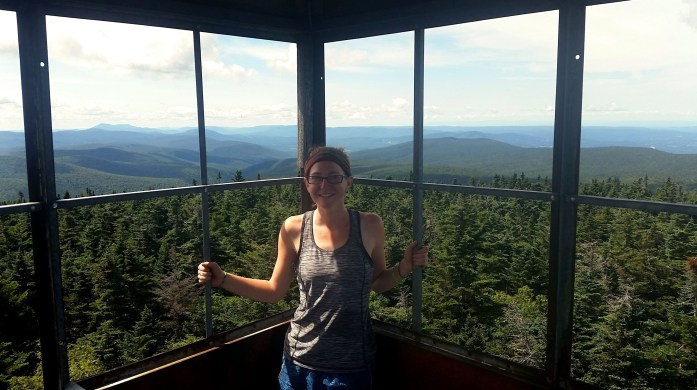
The John Muir Trail (JMT)
Location: Central California
Length: 215 Miles (346 km)
Ave. Time to Thruhike: 3-4 weeks
High Point: Mount Whitney – 14,496 ft (4418 m)
Low Point: Happy Isles, Yosemite Valley – 4000 ft (1200 m)
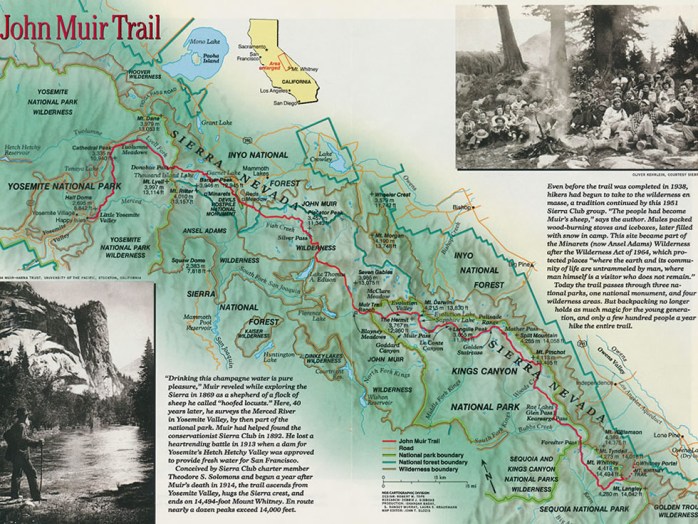
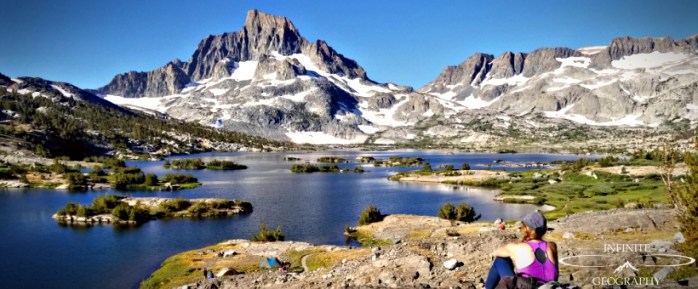
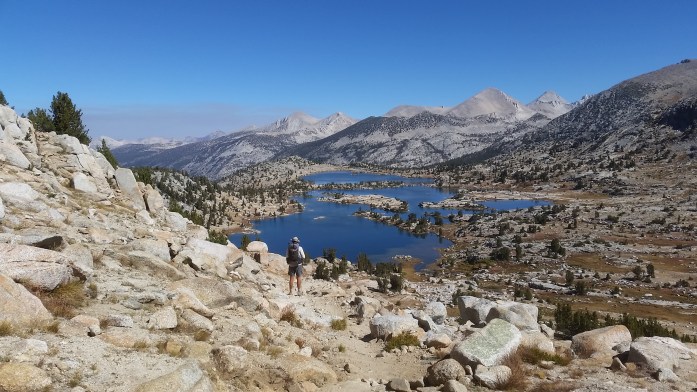
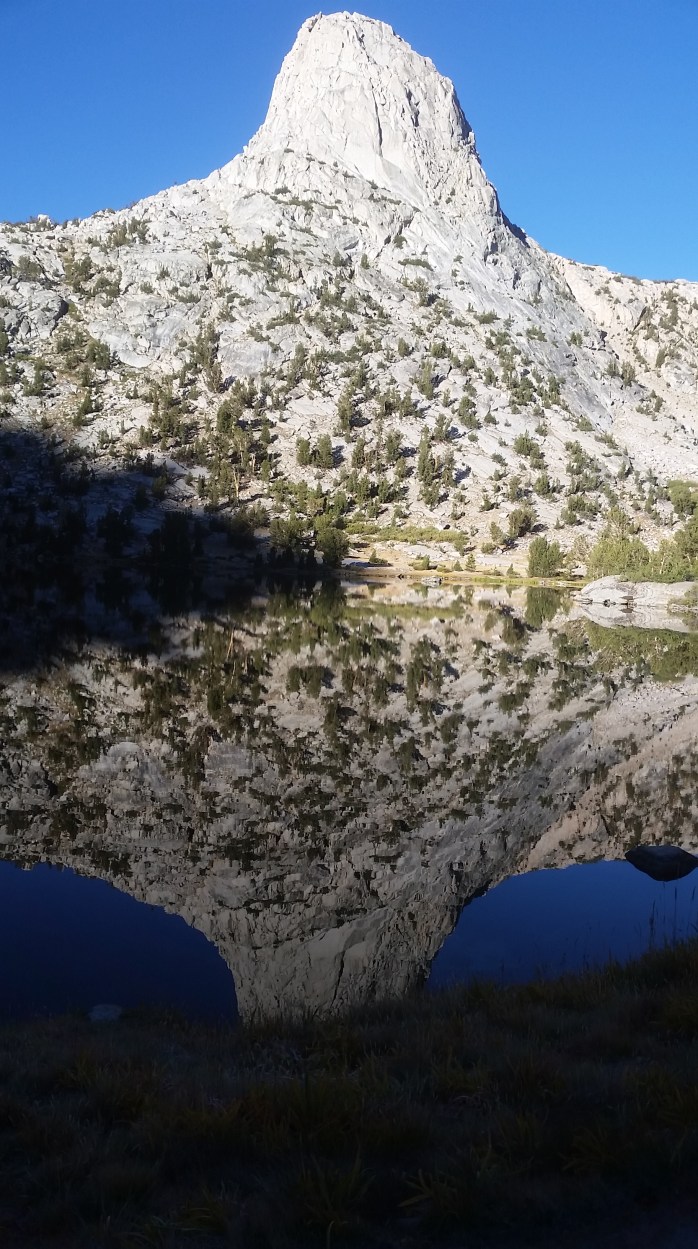
The John Muir Trail is an increasingly popular trail and perhaps some of the most beautiful 200 miles in the world. The JMT’s northern terminus is in Yosemite Valley, and the southern terminus is on top of Mt Whitney, the highest point in the contiguous United States. The JMT coincides with the Pacific Crest Trail for approximately 170 miles. This gorgeous trail includes unparalleled mountain views, jaw dropping waterfalls, unbelievable rock formations, and crystal clear high alpine lakes. Overall, the JMT is a series of climbing and descending high passes through nature’s eye candy. Most hikers go southbound ending their hike on Mt Whitney. Permits are required (and are definitely checked) as the trail passes through Yosemite and Kings Canyon / Sequoia National Parks. It’s no surprise that getting permits to hike this heavily sought after trail can be difficult. Click here for the National Park Service page for more information about obtaining permits.

The JMT can be hiked end to end in 3-4 weeks, though I recommend taking your time to a) acclimate to the very high elevation and b) enjoy every bit of trail for as long as possible. Altitude sickness is a serious matter, so take your time to acclimate especially if you’re beginning at Mt Whitney and hiking northbound. The JMT fluctuates above and below treeline, so sun protection is a must, and weather at this high of elevation can change quickly and without warning. Snow pack can cover the trail through June, and snow can come back into the high Sierra as early as September. Mosquitoes can be really thick and quite a nuisance from May – July.
I think I’ll just let the pictures do the rest of the talking…


Sources: PCTA.org, HighSierraKiwi.com, JohnMuirTrail.org
The Colorado Trail (CT)
Location: Colorado, Denver to Durango
Length: 486 Miles (782 km)
Ave. Time to Thruhike: 4-6 weeks
High Point: 13,271 feet (4,045 m)
Low Point: Waterton Canyon – 5,500 ft (1,700 m)

- Map via ColoradoTrail.org
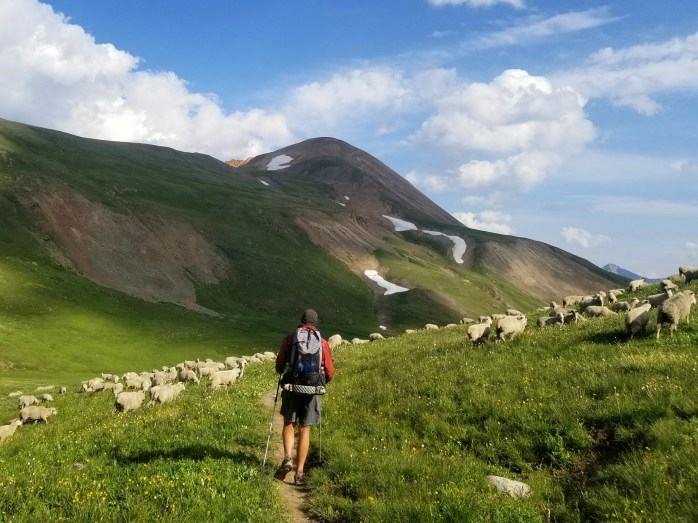
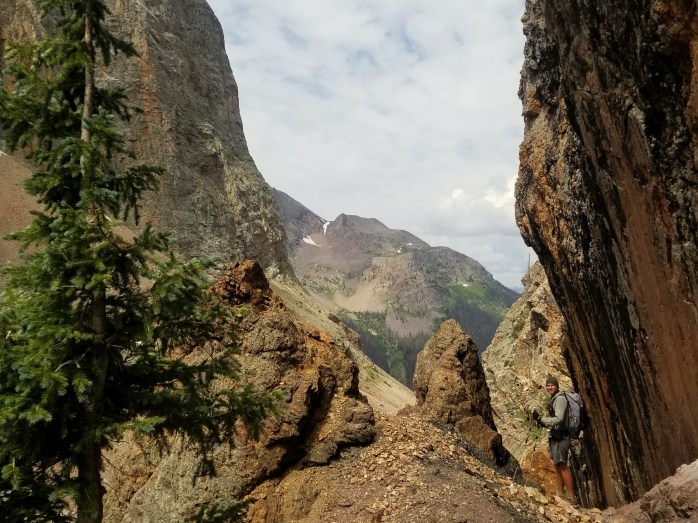
The Colorado Trail is an incredible thruhike that will take about a month to hike from end to end. The northern terminus is at Waterton Canyon outside of Denver, and the southern terminus is in the San Juan Mountains near Durango. The majority of hikers trek southbound though the trail can be hiked in either direction. The CT is very remote and has millions of wildflowers, interesting rock formations, epic waterfalls, abundant wildlife, and mountain views as far as the eye can see. The CT does not require a permit. The CT rides the Continental Divide which brings unpredictable weather. During our 5 week hike, we experienced afternoon rain storms almost every day. It is important to time your day with the varying weather in mind. Storms can appear quickly and bring strong winds, rain, snow, or hail. We experienced all of these elements in July. Hikers should be prepared for limited water availability from the northern terminus through about the first 80 miles. The prime thruhiking season is June – September due to lingering snow pack in high elevations. The trail is divided into 28 segments making section hiking fairly simple. Check out our journey on the CT here and more information about the trail at ColoradoTrail.org.


Source: ColoradoTrail.org
Have you hiked any of the “Little Three”? We can’t wait to complete a full thruhike of the Long Trail and the John Muir Trail one day.
Follow along here and on Instagram as we head out for the Continental Divide Trail this spring to complete the Triple Crown!!
Gear Review: Sawyer Squeeze Water Filter

Sawyer Squeeze Water Filter
On both the Appalachian Trail and the Pacific Crest Trail, our preferred method of water purification is the Sawyer Squeeze Water Filter (full size). This is what I recommend for water treatment to others and what I will continue to use in my backpacking career. (This is my unsolicited opinion after hiking over 5,000 miles!)
Lightweight and Portable
Unlike bulky backcountry water pumps, the Sawyer Squeeze is a small filter that weighs 3 ounces and is 5″ tall and 2″ wide. It includes a 32 oz water bladder that screws onto the filter.

Quickly Purifies Water
Unlike purification drops that take a half hour to work, the Sawyer Squeeze takes about 30 seconds to filter. Sawyer’s website claims that it “removes 99.99999% of all bacteria, such as salmonella, cholera Leptospirosis, and E.coli; removes 99.9999% of all protozoa, such as giardia and cryptosporidium”

Easy to Use
The Sawyer Squeeze is super easy to use. Just fill the bladder with water from a spring, stream, creek, etc. and attach the Sawyer filter. Squeeze the water through the filter into a clean vessel or you can drink directly from the filter itself. Easy peasy.
Overall
If you’re spending time in the backcountry, you’ll need a water purification method. This is the simplest, quickest, and lightest weight method on the market. I highly recommend a full size over the mini to increase your flow rate. I’ve seen dozens of minis in hiker boxes abandoned by annoyed hikers. I also recommend carrying an extra filter bag as the ones included have a tendency to spring a leak.
Do you have another lightweight water purification method you swear by? I’d love to hear your feedback in the comments!
Follow along!
Every Ounce Counts – The Importance of Ultralight Backpacking

Three years ago, backpacking gear made my head spin. I was totally lost as I looked over the infinite options for the precious few items I would be bringing with me on my Appalachian Trail thruhike. But over the past few years and 5000 miles on trail, the greatest lesson I’ve learned when it comes to gear is that Every. Ounce. Counts. Every single item you hit the trail with is your responsibility to carry. What are you willing to haul over mountains?
When it comes to gear, I understand that backpackers have a TON of questions. Today, I wanted to discuss the importance of building a ultralight backpacking kit from the beginning and how to achieve that goal.

Why Go Ultralight?
Minimize Impact of Injury
Plain and simple, this is one of the most important aspects of lightening your load. Every ounce you carry on your back takes a toll on your body. Carrying less weight puts far less strain on your muscles which can cause discomfort or injury. Additionally, cutting the weight and balancing your pack correctly will help minimize the risk and damage done by a bad step or a fall.
Less Work = More Fun
The more weight you carry on your back, the more work and energy it takes to hike the trail. Try to take only the things you need into the backcountry with you. I’ve seen people bring whole rolls of duct tape, multiple outfits, and who knows what else on short backpacking trips. Typically, they get to camp and start mumbling profanities about how much they hate their pack. Truth – the weight of your pack can make you miserable. Would you rather carry 50 lbs or 20 lbs over a mountain? Trust me, getting your pack weight down will make your trip so much more enjoyable.
Cover More Ground
I’m sure that it’s no surprise that carrying less weight means you can travel faster. If you want to increase your daily mileage, cut your pack weight! You’ll be amazed at how much faster and freer you can walk.
Choosing the Right Items
Embracing Minimalism
Going ultralight isn’t just about buying the top gear brands (though if you can, send it). It’s about truly embracing minimalism. What do you really need out there? Answer = not very much. Try to keep it to the essentials with one or two “luxury” items. Check out our full PCT gear list here. (This is a Google spreadsheet and is easiest to view on a desktop.)

Food and Water
This one is a little tricky to get right, but be careful not to over pack on food when you hit the trail. A good rule of thumb is 1.5 lbs per day. Check out my article on our PCT Food Strategy which includes full lists of our favorite trail foods.

If you’re going on an overnight trip, you’re going to need a way to purify water. We prefer the Sawyer Squeeze filter method as the filter only weighs 3 oz. (I recommend the full size Sawyer as the mini has a ridiculously slow flow rate.) Water weighs 2.2 lbs per Liter so it’s important to carry only what you need. Every adult should be drinking 2 L per day and more for rigorous activity. We plan on at least 1 L for every 4-5 miles hiked. We do our best to “camel up” while we’re at the water source to ensure we are fully hydrated before we walk away. Always err on the side of carrying too much water than carrying too little. With practice, you will find the right amount to carry for your individual needs.

Clothing
Most backpacking beginners have the tendency to over pack when it comes to clothing. All you need is one outfit to hike in and one outfit for camp plus some warm layers. Oh, and don’t forget your rain jacket! Even if it looks like sun, always be prepared for shifting weather – especially in the mountains.
Hiking Outfit = Pants, Shirt, Underwear, Socks, Shoes, Gaiters, Brimmed Hat
Camp Outfit = Shirt, Thermal Top, Shorts, Thermal Tights, Thermal Socks, Beanie, Gloves, Thermal Jacket, Camp Shoes (optional)
When shopping for your backpacking clothes, keep in mind cotton is not the fabric of this life. Not only is it a poor choice for exercise clothing, it’s also heavy and bulky to carry as camp clothing. Focus your clothing choices on synthetic materials, down, and wool. Bring a synthetic or down jacket and leave the cotton hoodies, ponchos, or sweatshirts at home to minimize weight and volume. Consider the weight of the clothing, rain jacket, and thermal jacket you will be carrying on the trail.

Shoes
Many people automatically think about boots when it comes to hiking, but I encourage you to check out some good trail runners instead. Trail runners are lightweight and dry out quickly while boots are heavy and clunky and can take forever to dry out if they get wet inside. I swear by Salomon trail runners and have hiked over 5000 miles in them. I’m already stocking up for our Continental Divide hike (3100 miles) next year.

Camp shoes are something I have decided not to carry any more to save weight. This might be a hard sell for some, but even lightweight Crocs, which are popularly used as camp shoes, can weigh a pound or more depending on the size. Since we wear trail runners, I have ditched the camp shoes and just loosened the laces when I get to camp. I will admit, it is nice to have a dry pair of comfortable shoes to put on at camp. But do I really need to carry that extra pound?

Backpack
Don’t forget to add in the weight of your empty backpack to your total base weight. For a lightweight option, I recommend backpacks between 50-70 L that are under 4 lbs. For the ultralight option, look for a pack that is under 2 lbs made of Dyneema (water resistant material). If you are considering an ultralight bag, make sure you have other ultralight equipment to go in it. Many of the ultralight bags have a load carrying capacity around 35 lbs. Anything over that will not ride as comfortably as a standard backpack.
Sleeping Bag / Quilt
Investing in a high quality sleeping bag can make the biggest difference in your pack. I carried a synthetic North Face sleeping bag on the Appalachian Trail that weighed 3 lbs and took up a third of the volume of my pack. I upgraded for the Pacific Crest Trail to an Enlightened Equipment (EE) Enigma down quilt, and it made a HUGE impact on my setup. Not only did I shed 2 lbs of pack weight, the quilt takes up significantly less space in my bag. Without switching to a down quilt, I would not have been able to upgrade to an ultralight backpack due to the volume of the synthetic sleeping bag.
I know a lot of backpackers are on a tight budget, but this is the one thing I would recommend spending the extra money. Truth, my EE quilt cost about $300, but I’d pay it all over again if I had to. It’s that important – less weight, less bulk, SO comfortable. Check out my full review here.

Miscellaneous Items
Electronics
Do you really need that bulky solar charger strapped to your pack? I do bring my smartphone backpacking which serves as my phone, camera, and guide book. I rock it in airplane mode and battery saver mode and can ration my battery for over a week. Portable and solar chargers really make up unnecessary ounces in your pack. Disconnect. It feels awesome.
Stuff Sacks
Yes, every ounce counts – even the sacks you use to organize your things. We use separate Dyneema stuff sacks from ZPacks for our food, clothes, and misc. items. Dyneema is an ultralight plastic material that is also water resistant. We have the fleece lined roll top bag for clothes which doubles as a soft pillow at night.
Toiletries

You don’t need them out there! Embrace the one place in life where you don’t have to dress to impress or cover up your natural odors. I do not bring deodorant, soap, shampoo, or any makeup into the backcountry. In fact, many of these products are often damaging to water sources, plants, and wildlife. Why carry it? Embrace your inner stinky self. It’s fun! Less stuff, less weight on your back. I’d rather be smelly than carry more things. Seriously.
First Aid and Repair Kits
I keep two things in my first aid kit. Ibuprofen and Bandages. That’s it. My repair kit has a needle and thread and a small amount of duct tape wrapped around my trekking poles. Everyone’s kits are going to vary as to what is essential to each individual, but keep in mind, you aren’t in the woods forever and all of town’s necessities are usually not that far away. Remember, only carry what you need.
Look, I know that people don’t necessarily enjoy being told what they should or should not carry. By all means, hike your own hike. Bring whatever you like. In my experience, however, backpacking with less weight is significantly more enjoyable. If you’re still picking out items for your pack, my biggest recommendation is to buy the lightest weight item you can afford. Yes, ultralight gear isn’t necessarily the cheapest, but it can be done on a budget. Check out this impressive article from The Trek that assembles an ultralight pack for $1000. I’ve seen tons of hikers get out there, realize they want something lighter, then they buy a replacement product essentially buying the same item twice. Do it right the first time if you can!

Backpacking on a Budget – How We Manage Long Term Travel

I’ve been very blessed to have spent the last four years living out of a backpack either on the trail or hostel hopping between countries. It’s a life that I never thought possible in my wildest dreams. But, here I am, doing the writing of the stories instead of the wishing.
Today, I want to try to finally answer the popular question “How do you afford all of this?”
But, it’s not as simple as it sounds. I didn’t just wake up one day knowing how to budget travel, and there is so much more to it than just listing what websites I use to book flights. I’ll do my best to stay on track. Ok, ask again.
How do you afford to travel long term?

How We Make Money
Sean and I have worked in the restaurant industry off and on for nearly 14 years. With our experience, finding a job has never been a problem. The ebb and flow of the restaurant industry allows us to find a job wherever we go.
In 2013, Sean discovered Coolworks.org, a website that posts seasonal positions. He found a position cooking in a resort for the summer in Denali National Park, Alaska. Since then, we have made connections in the industry that have brought us to Stratton Mountain Ski Resort in Vermont, a gig in catering for Coachella Music Festival in California, and a winter gig at Togwotee Mountain Lodge in Wyoming. Coolworks posts all different jobs stretching across the USA including not only restaurant work but also snow removal and grooming, mechanics and repair, administrative and office, hospitality, event planning, outdoor guides, etc.
Seasonal jobs vary extensively, but we’ve been lucky to find gigs that have cheap on site housing. Working seasonal jobs has allowed us to discover a new part of the country even though we have to work full time while we’re there. Seasonal jobs tend to have some fun perks too. We’ve gotten free ski passes, employee snowmobiling outings, dog sledding, resort restaurant discounts, etc.

How We Spend Money
VERY CAREFULLY!!!
Over the past few years, we’ve cut out a lot of bad habits that were blindly draining our bank accounts . We closely monitor the money we spend in restaurants and bars, and we rarely ever shop for new clothes, shoes, any household items, etc. We comfortably thrive on $1000 each per month or less including all bills, travel expenses, food, etc.

Before my first big trip to Latin America, I went into full hermit mode to save money. Having a concrete goal helped me break a lot of bad spending habits. If you’re unaware of your spending habits, I invite you to calculate your essential annual spending (rent, bills, food, etc.) and compare it to your annual income. Is there a significant difference? Where does all that money go? I used to think I couldn’t afford to save money, but I was absolutely lying to myself. I buckled down and saved more than I ever thought possible in order to break the cycle by only allowing myself to buy what I needed. Even though it wasn’t fun, being strict with my money and learning to save changed my life.
Another reason we are able to travel long term is because we’re comfortable being uncomfortable. We don’t spend a bunch of money on fancy hotels and luxury resorts. We’ll even take an overnight bus to save money on accommodation, and we’ve spent more than a year’s worth of nights sleeping in a tent. If you’re okay with all of that, traveling long term becomes affordable because you’re not paying for a house. Rent, utilities, internet, furniture, and sometimes breakfast are all included in the price of a hostel.
With everything in life, traveling long term is certainly a trade off from the stability of living in one place. Even though we’re on the go and rich in experience, our lives are pretty bare bones when it comes to possessions and luxury.

My Travel Tools
Lodging
- Hostels
- I use Hostelworld.com to find deals on bunks or private rooms when traveling outside of the US.
- During my five months in Latin America, I never paid over $15 / night for a bunk. Most of the time it was under $10 / night.
- Sometimes I found better deals by not pre-booking a bunk online and just showing up in a town and winging it from there.
- Hotels
- We try to stay at hotels sparingly, but at times it is unavoidable.
- I use Hotwire.com if we are getting a room last minute. This website books the room for you in a general area and with a given star rating without telling you the name of the hotel saving you a little bit of money.
- I also use Kayak.com and often the deals are comparable to Hotwire even without the hidden name concept.
- AirBnB
- Check out Airbnb.com when traveling especially with a group. Often times, you can get a whole house for the price of a hotel.
- Camping
- Sometimes camping costs a fee particularly within a private RV park or State / National Parks. Within national forests and on BLM land, camping is often free. If you’re okay sleeping in a tent, this is by far one of the biggest ways to save money while traveling.
- Freecampsites.net is a great research and planning tool to find free spots to pitch a tent.
- Couchsurfer / Warm Showers
- Full disclosure, I’ve never used Couchsurfer or Warm Showers, but I know many travelers that do. Both websites link travelers to hosts that provide at least a place to sleep.

Transportation
- Flights
- We use Southwest Airlines regularly as they often have the best deals, and they include 2 checked bags per person for FREE! They also have free flight cancellation (at least 24 hours in advance). I’ve definitely booked some flights unsure if we’d be able to make them, then cancelled and booked new flights using the credits.
- I compare flights on Kayak.com if we are traveling without too much luggage. Kayak has the feature to view by month so you can easily see when to get the best deal.
- I’ve gotten deals by booking far in advance and sometimes I’ve found better rates last minute. Tuesdays are supposedly a good day to fly and to book flights.
- Flexibility in travel dates is a major reason why we are able to find great deals.
- Check “nearby” airports and see if busing to the intended destination will save some money.
- Bus

Waiting on the bus in Costa Rica - Megabus.com has been useful connecting us from a smaller city to a larger city to get to a bigger airport and, therefore, get a cheaper flight.
- We rarely travel by bus in the USA (Greyhound = no thanks) but have used bus travel extensively in foreign countries. Latin America, for example, has an impressive network of buses within and between cities and countries. Bus terminals in larger cities can be as big as airport terminals.
- Train / Metro
- While long distance train travel may seem novel, the time commitment and expense has not held up compared to flying. I always double check Amtrak.com, but typically the cost is the same as flying though taking the train takes significantly longer.
- Metros or subways have been super helpful getting around in larger US cities like Seattle and New York City. It is usually a lot cheaper to use this form of public transit than taking cabs.
- Car Rentals
- We rent cars semi frequently when we travel. Doing a “one-way” rental (ie picking up the car at one location and returning it to another) has saved us tons of money over buses or trains. Plus, we get the convenience of having our own wheels. I typically book these through Orbitz.com or Enterprise.com. Both websites usually have free cancellation.
- If you’re doing a “one-way” rental to or from an airport, check if there are any rental offices near the airport instead of at the airport. We’ve saved tons just by taking an Uber / Lyft between the airport and rental office or vice versa.
- Cabs / Uber / Lyft
- In the US, we use Uber and Lyft frequently. It makes getting around a city or to / from the airport very simple.
- In other countries, we sometimes take cabs. Often, it’s the easiest, though not the cheapest, way to get where you want to go.
- Travel by Foot
- Really want to save? Travel by foot, combined with camping, is one of the cheapest things you can do with your time. Once your gear is purchased, all you actually have to buy is food and the occasional shower. You can travel indefinitely by foot for as long as you can figure out keeping yourself fed.
- When travel by foot in the city is an option, we usually take it within reason. Cabs / Ubers will add up.
- Curious? Hiking the Appalachian Trail cost us $3000 each and took almost 6 months. The Pacific Crest Trail cost us about $4500 each and took 5 months to hike. (Neither of these includes gear.)

Research, Planning, and Thinking Ahead
If you follow our Instagram, you might think all of our trips happen on a whim, but in reality, hundreds of hours of research go into every trip. As previously mentioned, I didn’t wake up one day knowing how to do all of this. It happened gradually as I researched and then put what I learned into practice.
If you’re thinking about a long distance hike or extended trip, just start googling it. Poke around my blog for stories about hiking the Appalachian Trail or Pacific Crest Trail or hostel hopping through Central and South America. Look at a map. Check out other blogs like Nomadic Matt or join Facebook groups like Nomads – A Life of Alternative Travel or Girls Love Travel. Try to figure out what your travel objective (cities, mountains, historical sites, beaches, cultural exchange, etc.) is and build a plan around that.
Remember, it’s not just about figuring out how to pay for it. It’s about embracing minimalism, being comfortable with the uncomfortable, and making a lot of sacrifices. For me, it was a want above all others. I traded basically my entire life and everything I owned in order to chase a dream of seeing the world. It didn’t happen overnight, but now, we’re finding it harder to stop than it was to start.
The picture below is a great reminder. I had no idea what I was doing, yet still somehow I planned, researched, and executed a five month trip busing from country to country speaking broken Spanish through 13 countries in Latin America.
And it was just the beginning of a beautiful journey.
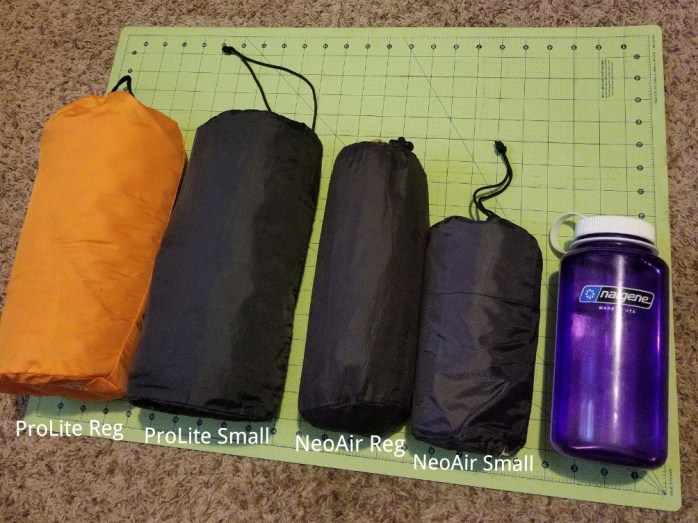
Gear Review: Thermarest ProLite and NeoAir

ThermaRest ProLite and NeoAir XLite
For both the Appalachian Trail (AT) and the Pacific Crest Trail (PCT), Sean and I used Thermarest sleeping pads without complaint. We both used the ProLite model on the AT and upgraded to the NeoAir XLite (NeoAir) for the PCT. Both are wonderful products and will suit you well for backpacking. (This is my unsolicited opinion. I love Thermarest products!)
Comfort
ProLite – This sleeping pad has self inflating die cut foam. When the nozzle is left open, the mattress will partially self inflate and needs only a couple more breaths to be filled to the desired firmness. The foam creates a very comfortable pad for a great night’s sleep. I had no complaints sleeping on the mattress for nearly six months of hiking the AT. On a ground (1) to plush mattress (10) scale, I would give the ProLite a 6 in terms of comfort.
NeoAir – This pad does not have a foam center. Instead, it is 100% air filled. I found this design to be more comfortable as it puts more distance between your hips and the ground. The only downfall is that the inflated plastic makes quite a bit of noise when switching sides during sleeping. On the scale mentioned above, I would give the NeoAir an 8.

Lightweight and Compact
ProLite – Both the small and regular size are about 11″ long and 5″ in diameter when deflated and put inside the included stuff sacks. They are about the length of a football though half the width. The regular size weighs 16 oz and the small is 12 oz.
NeoAir – Once compacted, the regular length is 10″ long with a 3.5″ diameter. The small (3/4 length) is 7.5″ long and 4″ in diameter. It is slightly smaller than my 1 Liter Nalgene bottle for comparison. The regular weighs 12 oz and the small 8 oz.
Durability
I’m not certain if any product is made to take on 5+ months of daily use. Both models of sleeping pads encountered problems towards the ends of our hikes. Thankfully, the company stood by their warranty and replaced the items quickly when we contacted them about our issues. For average use, I wouldn’t expect either model to have any problems.
ProLite – Sean had a problem with his ProLite towards the end of our AT thru-hike. The glue that holds the foam and the plastic together was coming loose which created a pocket where all of the air inside the mattress gathered. It was like a beach ball at one end of the pad. This pad was replaced in store as quickly as possible once we were in town.
NeoAir – My NeoAir developed a small, undetectable leak towards the end of the PCT. Overnight, it would leak to about half capacity. The company mailed me a new one to the next trail town.
Overall
ProLite – This is a great sleeping pad that is still in the lightweight category and is an excellent value for the price. I would recommend this pad for shorter trips.
NeoAir – This is one of the lightest pads on the market as well as comfortable and warm. If you are an ultralight enthusiast and willing to invest some money, look no further than the NeoAir.
Thermarest updates their designs every year. These products are only getting lighter and more compact. I’ve spent almost a year sleeping on Thermarest sleeping pads, and I don’t envision myself switching brands. This is a brand I stick by and highly recommend.
Do you love your Thermarest pad? Have you had any problems with yours? I’d love to hear your feedback in the comments below!
Follow along!
Appalachian Trail vs Pacific Crest Trail

Appalachian Trail vs Pacific Crest Trail
We are frequently asked which trail is “harder” or which trail is “better” both of which are extremely difficult questions to answer. Since these trails traverse entirely different environments, the two trails actually have very little in common other than the fact that they are both long. We completed a northbound thru-hike of the AT in 2015. We completed a “most hike” (2400 miles) of the PCT in 2016 and finished our final 250 miles in 2017. Below, I’ve compared the stats, highlights, and challenges that arise on each trail.

Appalachian Trail (AT) Stats
- Length – 2,190 Miles (3,524.5 km)
- Total Elevation Change – 464,500 ft (141,580 m)
- Average Elevation Change – 212 ft/mile (40 m/km)
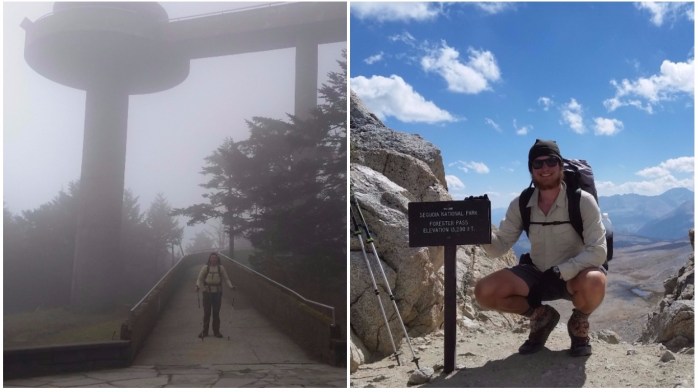
- Highest Point – 6,643 ft (2,025 m) – Clingman’s Dome, North Carolina / Tennessee
- Lowest Point – 124 ft (38 m) – Bear Mountain State Park, New York
- Foot Traffic Only
- Completed in 1937
- Southern Terminus – Springer Mountain, Georgia
- Northern Terminus – Mount Katahdin, Maine
- Ave. Northbound Thru-Hike begins March – May and ends August-October
- Ave. Southbound Thru-Hike begins May-July and ends September-November
- Includes 14 States – Georgia, North Carolina, Tennessee, Virginia, West Virginia, Maryland, Pennsylvania, New Jersey, New York, Connecticut, Massachusetts, Vermont, New Hampshire, Maine

Pacific Crest Trail (PCT) Stats
- 2,650 Miles (4,265 km)
- 489,418 ft of Elevation Change (149,174 m)
- 185 Ft/ Mile Average Elevation Change (35 m/km)
- Highest Point – 13,153 ft (4,009 m) – Forester Pass, California
- Lowest Point – 140 ft (43m) – Cascade Locks, Oregon
- Foot Traffic and Equine Traffic
- Completed in 1993
- Southern Terminus – Mexico / USA border near Campo, California
- Northern Terminus – USA / Canada border near Manning Park, British Colombia
- Ave. Northbound Thru-Hike begins April – May and ends September – October
- Ave. Southbound Thru-Hike begins June – July and ends October – November
- Includes 3 States – California, Oregon, Washington

Highlights of the Trails
Throughout the last few years, I have become passionate for nature and long distance hiking. In my opinion, there is nothing like the freedom of walking in the woods. Although it is not always easy, communing with nature in such a way is truly one of the greatest gifts I have ever received. There is no better way to explore the USA than by way of its epic trails. Here are some highlights I experienced on each trail.
Appalachian Trail
- Watching spring take over the forest first with budding trees and then being surrounded by wildflowers
- Waterfalls
- Ease of navigation, resupply, and general logistics
- Historical sites
- Being surrounded by forest and wildlife – various birds, deer, bears
- Views of green tree covered rolling mountains
- Great community including lots of trail angels and trail magic
- Fall foliage
- Frequent and beautiful water sources
- Rugged trail through moss covered rocks
- Location Favorites: Max Patch, NC; Smokey Mountain National Park, NC / TN; White Mountain National Forest, NH; Maine
Pacific Crest Trail
- Views, views, views
- Changing scenery
- Stunning volcanoes
- High alpine lakes
- Nice weather – barely any rainy days!
- Unique rock and mountain formations
- Specific Locations: Kings Canyon / Sequoia National Parks, CA; Mammoth Lakes, CA; Mt. Shasta, CA; Crater Lake, OR; Mt. Rainier, WA; Glacier Peak Wilderness, WA

Challenges of the Trails

Grade / Steepness
Though the PCT has much higher mountains than the AT, the AT is steeper and more strenuous. The AT tends to summit the mountains in its path while the PCT will meander through the pass between the mountains. The PCT was created to be equine friendly from Mexico to Canada therefore the average grade is considerably less steep than the AT.
Rocks and Roots
The AT is somewhat infamous for its massive boulders and slippery exposed roots. Both obstacles become a major issue and annoyance causing hikers to considerably slow their pace in many sections. Since the PCT is equine friendly, rocks and roots are cleared and rarely create a noticeable problem.

Climate and Weather
AT – The AT has a similar climate from Georgia to Maine and is primarily a forest ecosystem. Thru-hikers starting in February or March may experience temperatures around or below freezing at night in higher altitudes and may see some snow. Summers can bring high heat (~100°F / 38°C) and high humidity. Hikers can expect rain and thunderstorms at anytime. Spring and fall rains can sometimes last for a week or more. You will get wet!
PCT – The PCT differs from the AT in that its sections have a diverse climate and ecosystems ranging from the desert to high altitude above treeline to rain forests. The southernmost section is about 700 miles of desert with scorching highs and cool lows at night. The desert leads into the High Sierra range of California with high altitudes presenting a new challenge. Snow tends to stay in this section until the early summer. Many hikers still need crampons and ice axes when making the traverse in June. Snow returns to the highest points as early as September leaving only a small window for hikers to make it through. Weather in this area is highly unpredictable and can change at any time. Snow melt can make for an easier hike in terms of navigation but can make water crossings extremely dangerous. Snow melt led to the deaths of two thru-hikers that were crossing flooded creeks in 2017 (a very high snow year). Washington is another challenge as the snow lingers for longer in the spring and comes early in the fall. Again, this area is known for unpredictable temperature and weather changes. A 2016 thru-hiker is still missing from a dangerous snow storm in Washington in October of that year. Varying climates and short optimal hiking seasons in some areas are one of the main challenges of this long trail.
In summary, frequent rain is one of the biggest weather related challenges of the AT while environmental extremes contribute to the challenges of the PCT.
Fog, Smog, and Smoke
AT – With the humidity on the East Coast, it’s no surprise that fog is frequent on the AT. Though fog isn’t necessarily a physical challenge, it sure does get annoying when you climb to the top of a mountain only to be socked in with fog. It happened multiple times on our thru-hike, and it’s just one of those things you have to accept and walk on. Thankfully, smog and smoke weren’t an issue at all on the AT in 2015.
PCT – We experienced fog, smog, and smoke on the PCT. Smog was noticeable in Southern California in the desert as we neared Los Angeles, fog affected us in Washington, and smoke was noticeable in Northern California and Washington.

Water
AT – The AT has an abundance of water sources along the trail such as streams, creeks, rivers, and lakes.
PCT – The PCT varies on distance between water sources as the environments change. The desert section of the PCT creates a serious challenge for hikers. There are several 20 mile stretches between sources, and our longest stretch was 42 miles. Though there are some caches, you should never fully rely on them and treat them as emergency sources only. A good rule of thumb is to carry a minimum of 1 L of drinking water for every 4-5 miles you intend to hike. Always treat your water in the back country before drinking. The Pacific Crest Trail Association keeps a crowd sourced water report that is typically very up to date. Check it out here.

Navigation
AT – The AT is clearly marked with white blazes for the majority of the trail. We used AWOL’s AT Guide and did not carry maps. Whatever guide you choose should include distances between shelters and campsites, water sources, roads, and towns.
PCT – The PCT is marked with occasional PCT crests on trees and at trail heads but are not as frequently seen as the AT’s white blazes. We used Guthook’s PCT Guide App as our guide. We did not carry paper maps except as a backup when we were walking through snow covered sections of trail.

Altitude
AT – There are a few times where the AT climbs above treeline such as in the Whites and Smokey Mountains. Because there are somewhat frequent thunderstorms on the AT, it is important to monitor the weather when you are above treeline. Since the AT just barely exceeds 6000 ft, altitude sickness is typically not a problem.
PCT – The PCT spends a lot of time at high altitude and is frequently above treeline. Hikers coming into areas of high elevation from lower ones should take time to acclimate to the new atmosphere. Expect your hike to be somewhat more difficult in high altitudes as your body adjusts to the lessened amount of oxygen.
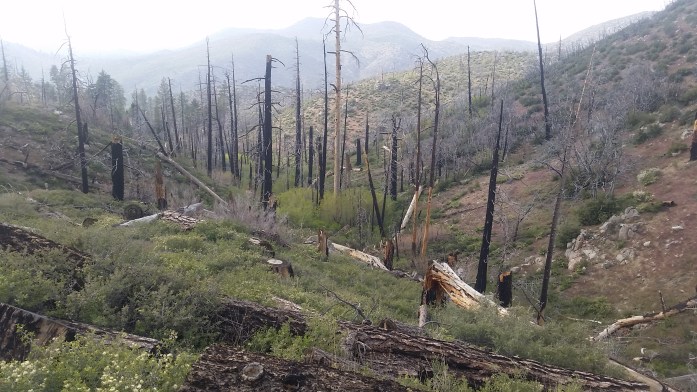
Wildfires
AT – Wildfires do happen on the East Coast and the areas surrounding the Appalachian Trail. Most recently, a large wildfire raged in the Smokey Mountains in 2016 destroying Gatlinburg, TN and thousands of acres of forest. That being said, they are significantly less frequent than on the West Coast. Our AT thru-hike was unaffected by any wildfires.
PCT – Wildfires happen every year on the PCT, can take place in virtually any part of the trail and can cause sections of the trail to be closed for many years after the fire takes place. When planning your PCT trip, you should anticipate the likelihood of active wildfires or closed trail due to past wildfires.
Resupply
AT – The AT crosses many highways that are typically less than 15 miles away from town. We would walk 70-100 miles between resupplies and hitchhike from the trail into town and back. Sometimes, the trail even occasionally walks right through town. We never waited too long for a ride into town and considered the logistics of resupply pretty easy. The entire AT can be done without using resupply boxes. It is easy to resupply at stores and the occasional gas station in town.
PCT – The PCT tends to be further away from towns and longer distances between towns than the AT. Hitchhiking took longer as some highways had very little traffic. Anticipate waiting for a ride longer than you might on the AT. The entire PCT can be done without resupply boxes, but there are a couple of instances where having a box mailed to you makes things a bit easier. For example, the High Sierra section is somewhat of a logistical nightmare for resupply and hikers will have to hike “extra” miles down a side trail to get to a road to get to town.
We used a combination of mail drops and resupplying as we go for both trails. Personally, I don’t recommend mail drops for those people not on a specific diet. To read more about our food resupply strategy for the PCT and how it turned out, click here.
![IMG_20170529_124638_258[1]](https://infinitegeography.com/wp-content/uploads/2017/06/img_20170529_124638_2581.jpg?w=698)
If you’re dehydrating meals then drop boxes are a must! Check out my article explaining how to dehydrate your own meals here.
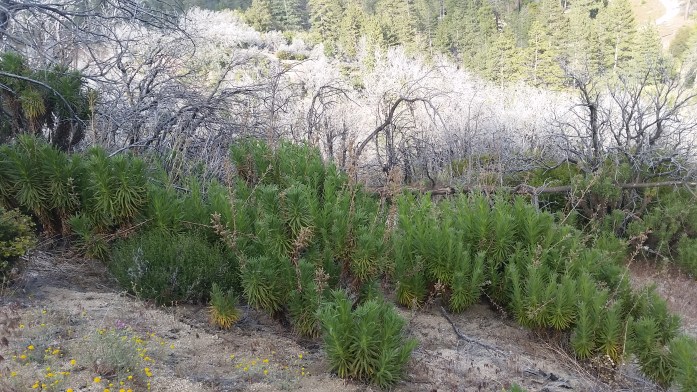
Bugs, Snakes, and Poisonous Plants
Bugs, snakes, and poisonous plants are a nuisance on both trails. Both trails have mosquitoes and disease carrying ticks, and thru-hikers on both trails can get Lyme disease. Take some time to familiarize yourself to the bugs, snakes, and poisonous plants present in the area. Both trails have their share of poison ivy and poison oak. The PCT additionally has poodle dog bush in the desert that is known to cause burns on people that brush against it.
Mental Challenges
If you’re thinking about a thru-hike, one of the biggest and overlooked challenges of long distance hiking are the mental challenges that come along with it and contributes to whether one might consider the AT or PCT “better” or “harder.” There were times on both trails we were bored, wet, tired, in pain, angry, starving, and with numb minds. Here are some things from each trail that challenged me.
AT – As I’ve mentioned above, the AT is a steep and strenuous hike with constant elevation gain and loss in a similar environment for months on end. Many hikers refer to the AT as the “green tunnel” describing the repetitive scenery. And it rains. A lot. When it’s not raining, the heat and humidity take a toll on your patience. Sprinkle mosquitoes and a Lyme’s Disease diagnosis in there and that’s the AT. Ok, the cynical, less awe inspiring version, but absolutely true. Did I mention there are miles of rocks that come out of nowhere sometimes that will cut your walking speed in half??
PCT – The PCT kept my mind somewhat more occupied with its changing scenery and environments, but not all of those environments are super fun. After a couple hundred miles of desert, carrying 10+ lbs of water through the blazing sun just gets old. Another challenge was the crowds when we started the PCT. As the trails get more popularized, more and more people come out to attempt a thru-hike. For whatever reason, we were largely put off by the crowds and decided to keep to ourselves. However, the large number of people in the beginning eventually led to us turning our planned straight thru-hike into a flip flop.
Though each trail had a few specifics that made them mentally challenging, a lot of the mental challenge was the same between the two trails. Keeping your motivation to finish a long distance trail will always be hard when you are in less than favorable conditions. I would be surprised to meet any hiker that never questioned what in the world they were doing out there. To get a little deeper in my head about the subject, click here to read “How is it out there?” for a more thorough explanation.
Other Differences
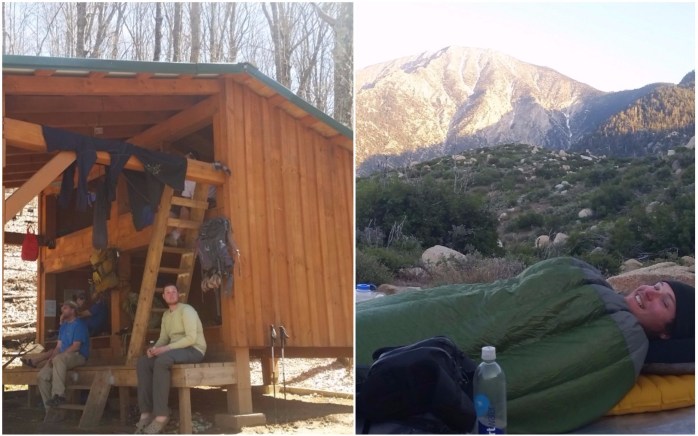
Shelters and Camping
AT– The AT has over 200 shelters open to any hiker. These shelters range from primitive three walled cabins to two story enclosed buildings. Many shelters have picnic tables, a nearby water source, and an area for tent camping. You may stealth camp on the AT at least 200 ft off trail, but this is often times hard to find because of rocks, trees, and uneven ground. You should always carry a tent or hammock and tarp and not rely on finding spot in a shelter.
PCT – The PCT does not have shelters, but I found that tent sites were easy to find and better spread apart than the AT. Since rain is infrequent on the PCT, we were able to “cowboy camp” (ie sleep under the stars without a tent) if it was warm enough.
Gear
AT – We used most of our items throughout our entire thru-hike. We did change our hiking outfit from long sleeves and pants to short sleeves and shorts. Sean switched from a regular sleeping bag to a sleeping bag liner in the summer and then back to the sleeping bag in the fall.
PCT – As the environments of the trail changed, some of our gear changed with it. We carried extra sunscreen and water containers in the desert, extra clothing layers in the High Sierra, and extra rain gear in Washington. The High Sierra and Washington sections may require the use of crampons and ice axes depending on time of year. Also, hikers are required to have a bear can on the PCT through Kings Canyon / Sequoia and Yosemite National Parks.
Click here to check out my gear section for full gear lists and reviews.
Community 
There is a noticeable community that surrounds the AT slightly more than the PCT. This may be because the AT is typically closer to towns than the PCT or because the AT is older. Either way, we experienced more trail magic, trail angels, and caught easier rides on the AT than the PCT.
Summary
So which trail is “better”? Geez, I really couldn’t say. Obviously, it’s a very personal and subjective question. To us, the AT had a more similar environment to the where we grew up in the Midwest, and it felt more like home. On the other hand, the PCT really showed me the best of the West. Both had their challenges, both had their beauty, and I would love to hike them both again.
Have you hiked both the PCT and the AT? Do you have a favorite? Let me know in the comments!
Follow along here or Instagram as we head out for the Continental Divide Trail to complete the Triple Crown in 2018!!
Edit: Since publishing this article, we finished the Continental Divide Trail and our triple crown. Click here to learn more about the CDT!
Sources: www.appalchiantrail.org and www.pcta.org
It Wasn’t a Thruhike – Thoughts from Completing the Pacific Crest Trail

It was almost exactly one year later when I found myself standing on the Pacific Crest Trail right where I had left off. Though the trail looked much the same, I had come to the trail different. I admired the mountains and trees with fondness and appreciation, unlike the year before when the trail seemed like some form of torture. I was happy to be back, to complete something I had started, to set my own measures and definitions of success.

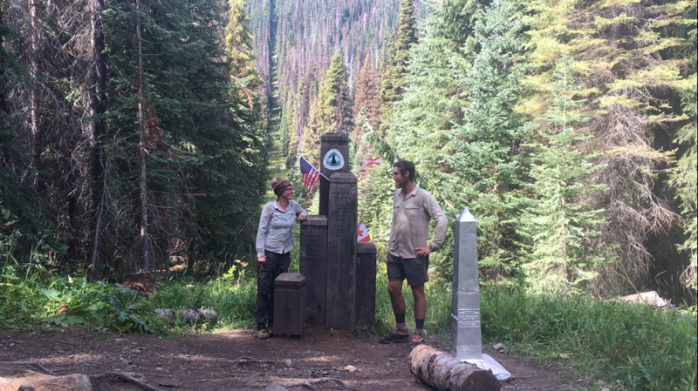
To clarify – in 2016, my now fiance and I began the Pacific Crest Trail from Campo, CA, at the US / Mexico border intending to walk to the Canadian border over the course of about 5 months. It was our second long distance hike after completing the 2,189 mile Appalachian Trail in 2015.

After about a month and 550 miles of Southern California desert, we made the decision to skip the still snow covered High Sierra section and pick up the trail in Northern California where we would continue hiking to Canada. We made it to Canada on August 24 with 2,050 miles done and 600 to go from Tehachapi to Truckee to close the gap we skipped.
We returned to the windmills in the Mojave desert, a stark contrast from Washington’s North Cascades, and continued our northward trajectory. Eventually, we put the desert behind us and entered the magic hiding in the High Sierra. But our days were becoming short, our will was wearing thin, even the beauty surrounding us couldn’t pull us out of the funk.
So, when we were offered a place to decompress at a friend’s near the coast, we jumped on the opportunity and said goodbye to completing the PCT in one season leaving 250 miles left undiscovered between Mammoth Lakes and Truckee. We knew we’d be back and that eventually we would complete what we started.
Well, I didn’t concretely know that I would be back a year later, but here I was just outside of Mammoth Lakes, as if I’d never left. It was significantly warmer than it had been on the Colorado Trail just a few weeks prior though we were at similar altitudes. We began on a side trail from Red’s Meadow Resort that would give us a closer look at Devil’s Postpile National Monument, then we were on our way linking footsteps from last year’s adventure.

Not being crunched by time, we decided to walk 15-20 miles per day which translated to 16 days to walk 250 miles from Mammoth Lakes to the I-80 just west of Truckee.

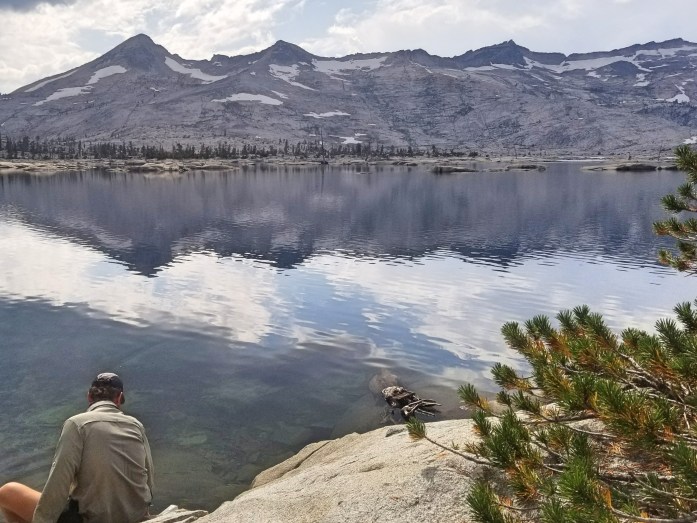
We were delighted to have plenty of time to enjoy ourselves and our surroundings – something you don’t get much of on a thru hike. The craggy mountains, crystal clear alpine lakes, and perfect weather made me question why we ever left this section.


But I hadn’t completely forgotten the pain of a thru hike, the mental and physical exhaustion, the mostly unanswered question of why in the world we undertake hiking thousands of miles all at once.


Other than a severe and sudden hail storm, our time on the PCT was entirely pleasant. We had otherwise perfect weather and jaw dropping views.

Sixteen days from Mammoth Lakes, through Yosemite, and around Lake Tahoe were over before we knew it. I stood a few feet away from the Donner Pass Rest Area off the I-80 where a dear friend was awaiting our arrival.

I finally knew every step of this trail. To the south were the epic structures of granite, marvelous sparkling lakes, and eventually sand, rocks, and relentless sunshine all the way to Mexico. To the north, proud volcanoes welcome you to the Cascades with views shifting from lava rock formations to the damp, moss covered wilderness areas of the Pacific Northwest. The Pacific Crest Trail is truly all encompassing, the best of the West, a gift for all those willing to walk it. And though it makes my story a bit more complicated to tell, I strongly feel this was the right way for us to hike this trail.

I will admit, finishing the trail this way did feel considerably less momentous than standing on Mount Katahdin in Maine after walking a continuous footpath from Georgia on the Appalachian Trail. However, I still question if the ego boost of thruhiking is worth the pain, sacrifice, and suffering necessary to complete these trails from end to end. So often, thruhikers get caught up in the destination, that we miss out on the journey. Though we’d enjoy stopping to smell the roses, we obligate ourselves into long days and punishing amounts of miles. I can’t imagine how John Muir would react to us “crushing 25s” in a machine like fashion through the section with his namesake…

Yet somewhere between this juxtaposition, I’ve fallen in love with long distance hiking and the freedom it brings with it. I consider myself privileged to be allowed the time and ability to discover these incredible public spaces. And I’m excited to announce that next year we’ll be going for the triple crown of hiking by attempting the Continental Divide Trail. Ideally, a thruhike, and maybe then we can put all this walking to rest.
So, I invite you to follow along as we prepare for yet another long distance hike and discover a bit more of this infinite geography laid out on this beautiful planet. It doesn’t seem real – but by this time next year, I could be a triple crowner 👑👑👑
Follow Along
Instagram.com/InfiniteGeography
Gear Review: Big Agnes Copper Spur UL 2

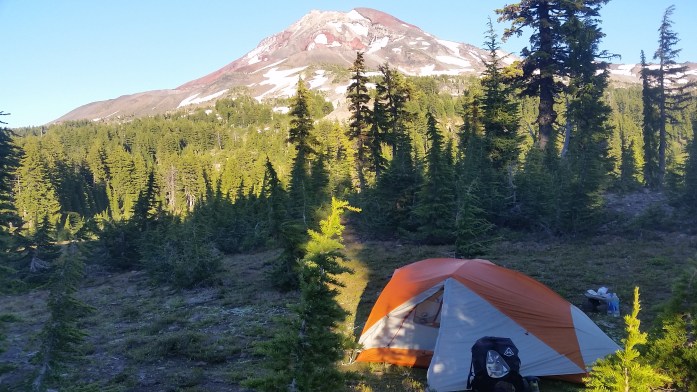
Big Agnes Copper Spur UL 2
For our PCT thru-hike, we decided to go with the very popular Big Agnes (BA) Copper Spur UL2, and we were oh so happy with this decision. We both loved this tent and would highly recommend. (Don’t worry, I wasn’t paid to say that. I really mean it!)
Ultralight
Weighing in just over 3 lbs, the Copper Spur is one of the lightest freestanding tents on the market. A freestanding tent is one that includes its own poles and can be moved around once it is erected. A non-freestanding tent is tethered to the ground and sometimes uses trekking poles to set it up. It’s debated among backpackers whether a freestanding tent or non-freestanding is better, but it mostly comes down to personal preference. (The Trek published a great article on the debate you can check out here if you’d like more information.) All that being said, there are quite a few lighter non-freestanding tents out there. However, Big Agnes takes the crown for ultralight freestanding tents.
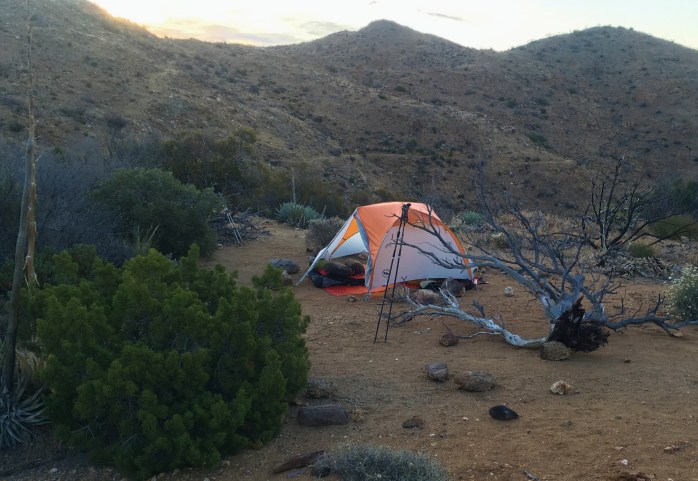
With the footprint (sold separately), the Copper Spur can be even lighter by just using the footprint, poles, and rain fly. We used this unenclosed structure in the desert when we weren’t concerned about wind, rain, or bugs. This will save you about a pound!
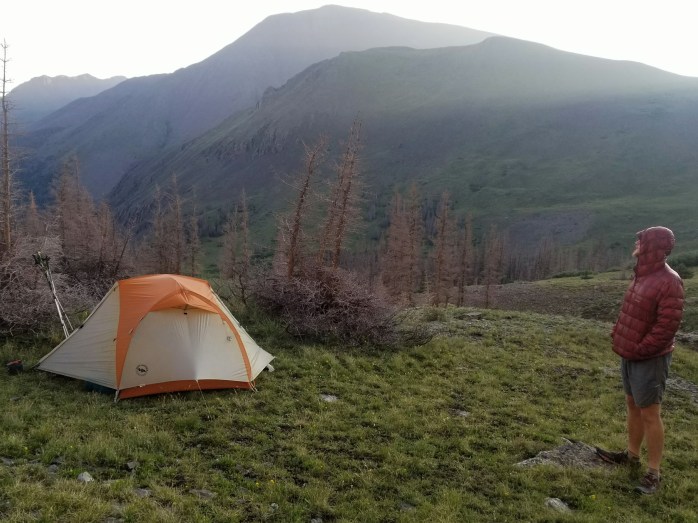
Weather Resistant
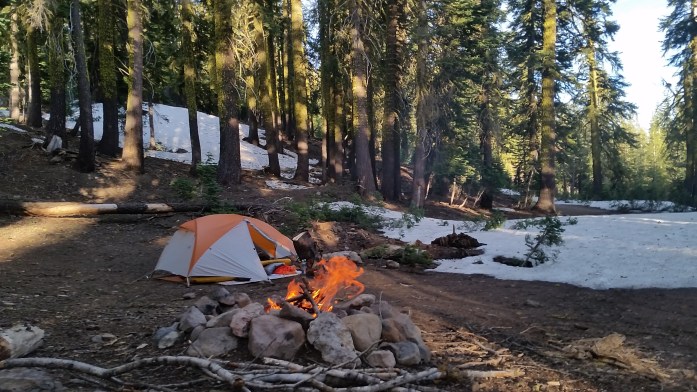
We used this tent through rain, snow, and crazy wind. The Copper Spur never lost a battle. Despite the weather, we remained consistently dry.
 Roomy
Roomy
One of our favorite qualities of this tent was how much space we had. Sean (6’5″) is able to sit up and stretch out comfortably inside without squishing me too much 😉 . Another huge bonus for a couple is having two doors and two vestibules. We hiked the Appalachian Trail with a Kelty Salida 2, and we knew that it was imperative to make a change from one door to two. We were very happy to have our own space for ourselves and our gear in the vestibule. No more crawling over our gear and Sean while its raining outside!

Quick Setup
The Copper Spur is very easy to set up and was designed so that one person can set it up. The tent includes one long pole with folding segments and one very short pole. We could probably set this tent up in 30 seconds. Very simple and straightforward.
Durability

As mentioned above, the Copper Spur handled the elements like a champ. Our one and only “con” with the tent is that we did have a problem with two cracked pole segments. I’m not entirely certain how the ends of the poles were cracked, but the crack started to spread down the pole with the string in the middle causing more and more damage. That being said, I contacted Big Agnes about the problem we were having, and they replaced the pole segments quickly with no questions asked. I can’t overlook the issue, especially because it happened twice, however, Big Agnes impressed me with their quick response and excellent customer service.
Overall
Truly, I love this tent. It was our home for 5 months on the Pacific Crest Trail and will continue to be our home as we hike the Colorado Trail this summer. The Copper Spur addressed the problems we had with our old tent, and I was very happy that we made this investment. If you are looking for an ultralight freestanding tent, look no further than the Big Agnes Copper Spur. (The latest model is the Big Agnes Copper Spur HV UL2 – $450. There are also 1, 3, and 4 person options.)
Do you love your Copper Spur or have another tent you recommend? I’d love to hear your input in the comments!
Follow Along
Gear Review: Enlightened Equipment Enigma Down Sleeping Quilt

Enlightened Equipment – Enigma
For the Pacific Crest Trail, Sean and I used Enlighten Equipment (EE) quilts. We both are absolutely in love with this piece of gear. No need for me to try out other brands, I 100% highly recommend Enlightened Equipment. (And no, I didn’t get paid to say that).
Sleeping Quilt vs Sleeping Bag
Sleeping quilts differ from sleeping bags in that quilts are not fully enclosed on the underside. The Enigma only has a sewn in foot box, and the rest of the quilt can be left undone. It has two large elastic straps that you can buckle underneath your sleeping pad to be completely cocooned into your sleep system. This not only sheds weight from a sleeping bag, it also is a more efficient method to retain heat and keep you warm on those chilly nights.


Down
Although EE does sell synthetic bags, their true specialty is in down bags. Down feathers are the small fluffy feathers from a duck or goose. I’m also pretty sure it’s what angel wings are made of. I’ve considered just switching over to my quilt for my every night’s sleep. It’s that comfortable.
Comfort aside, down’s biggest benefits over synthetic are its ultralight weight and its ability to compact. My Enigma weighs just over one pound and compresses to about the size of a football when stuffed into my ZPacks Dry Sack (medium).
One of down’s, well, downfalls is that it is basically useless if it gets wet. Thankfully, Enlightened Equipment has responded to this problem by treating the feathers with a water repellent called DownTek. Their website states that the treatment does not leave the quilt completely water proof and caution should still be taken. (The dry sack coupled with my Hyperlite Mountain Gear Pack is enough to protect my down bag.)
Some people have ethical questions about down sourcing. Thankfully, Enlightened Equipment states their commitment to ethically sourced down feathers on their website. They do not support live-picking or force-feeding.
Completely Customized
Although there are stock options, EE quilts can be made customized to your needs. The first decision is down fill power. What’s fill power? Fill power refers to the quantity of space the down feathers occupy when at full loft. The higher the down fill power, the larger the down cluster which creates a lighter weight (and more expensive) product. (Click here for a more in depth explanation from their site.) EE offers down fill powers of 850, 900, and 950.
The second choice is the temperature rating. This is the minimum temperature that this bag is rated to keep you alive (not necessarily what will keep comfortable). EE offers six different temperature ratings from 0°F to 50°F in 10°F increments.
Next is a size choice. EE allows you to choose the width and height separately. Remember, bigger bags are heavier and more expensive. And last, but not least, you get to choose the colors! Inside and outside!! There is an additional choice for weather resistant stripes as well. By the time you finish this process, you end up with a quilt that is 100 % built for you. What could be better than that?
Bekah’s Enigma- 900 down fill / 20°F/ Short 5’6″/ Reg Width – $325, 16.07 oz
Sean’s Enigma- 900 down fill /20°F/Long 6’6″/ Reg Width /+Weather Striping- $370, 19.7 oz
Cons?
I suppose my only negative comment is the price. However, you truly get what you pay for. If you are doing a lot of backpacking, I assure you this quilt is well worth the investment. Otherwise, I have nothing negative to say about my quilt. I’m hooked!! I also want a few more in different temperatures 🙂
One word to the wise –
If you are interested in purchasing one, keep in mind that your custom quilt is made by hand to order. Currently, EE states a 5-7 week lead time for down quilts and 2-4 weeks for synthetics. We ordered ours during peak “hiker prep season” (Nov-March) and waited about 10 weeks. Make sure you leave plenty of time between ordering and your trip!
Do you LOVE Your Enlightened Equipment Quilt? Let me know in the comments!!
Instagram.com/infinitegeography
